Adding Accounts: Auto-Sync or Add in the App
Two ways to get your social profiles into SMTasker — let them sync automatically from a phone that's already logged in, or add them in the app and let SMTasker log in for you.
Prefer to watch? The full walkthrough is on our YouTube channel — the written steps below match it exactly.
Before you can automate anything, your social accounts have to live inside SMTasker. There are two ways to get them there, and which one you use depends on where the account already is:
- Auto-sync from a phone — the account is already logged in on a connected phone. SMTasker detects that session and pulls the account in for you. No password required.
- Add it in the app — you type the account’s credentials into SMTasker, pick a phone, and SMTasker logs in for you on that device.
| Method | How the account arrives | You provide | Best for |
|---|---|---|---|
| Auto-sync from phone | Detected from a session that’s already logged in on the phone | Nothing — just the connected phone | Accounts you already use on that device |
| Add in the app | Created by you, then logged in automatically on the phone | Username & password (2FA / email optional) | Adding new accounts, or many at once |
Method 1 — Auto-sync from a phone that’s already logged in
An account already logged in on a connected phone syncs into SMTasker on its own — and lands on your Accounts page already Valid.
This is the simplest path: if a phone you connect to SMTasker already has the app logged in (Instagram, TikTok, or Threads), SMTasker recognises that live session and the account shows up on your Accounts page automatically — no credentials to type, no login step to wait for. It arrives Valid and ready to attach automations to.
Method 2 — Add accounts in the app (with auto-login)
When an account isn’t already on the phone, you add it in SMTasker and let the app log it in for you. The Add Accounts button opens a three-step wizard: Credentials → Assign Accounts → Review & Finish. Here’s each step.
Step 1: Open the Add Accounts wizard
Go to the Accounts page from the sidebar and click Add Accounts in the toolbar. (The same button also lives on the Devices page.)
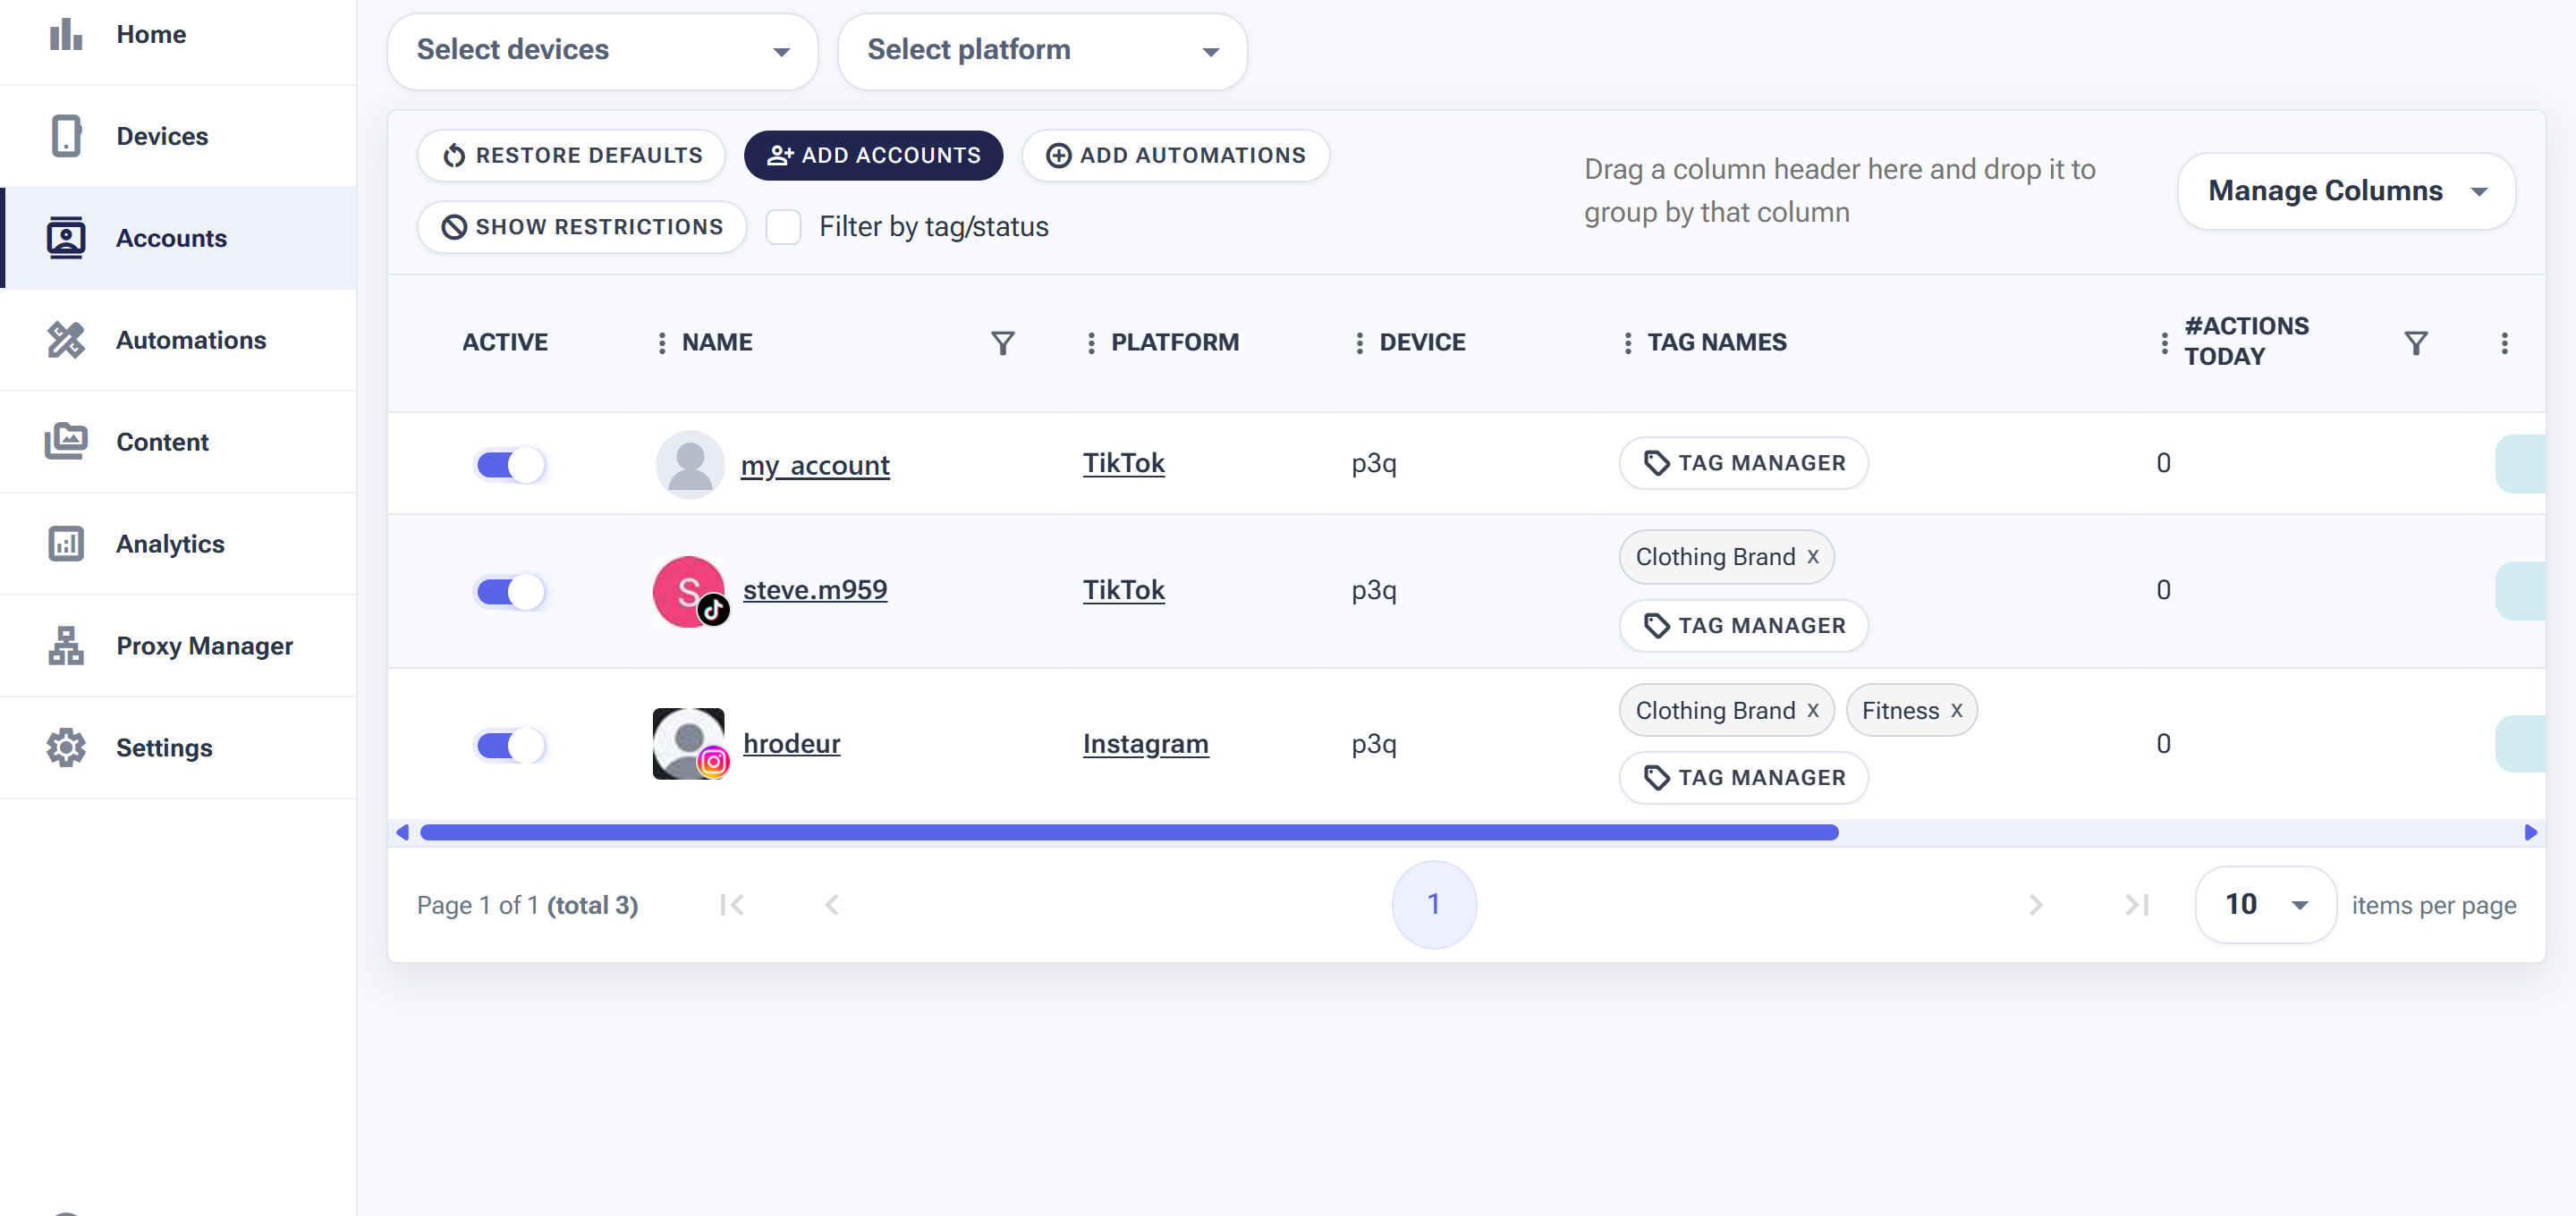
The Accounts page — click Add Accounts to open the wizard.
Step 2: Enter your credentials
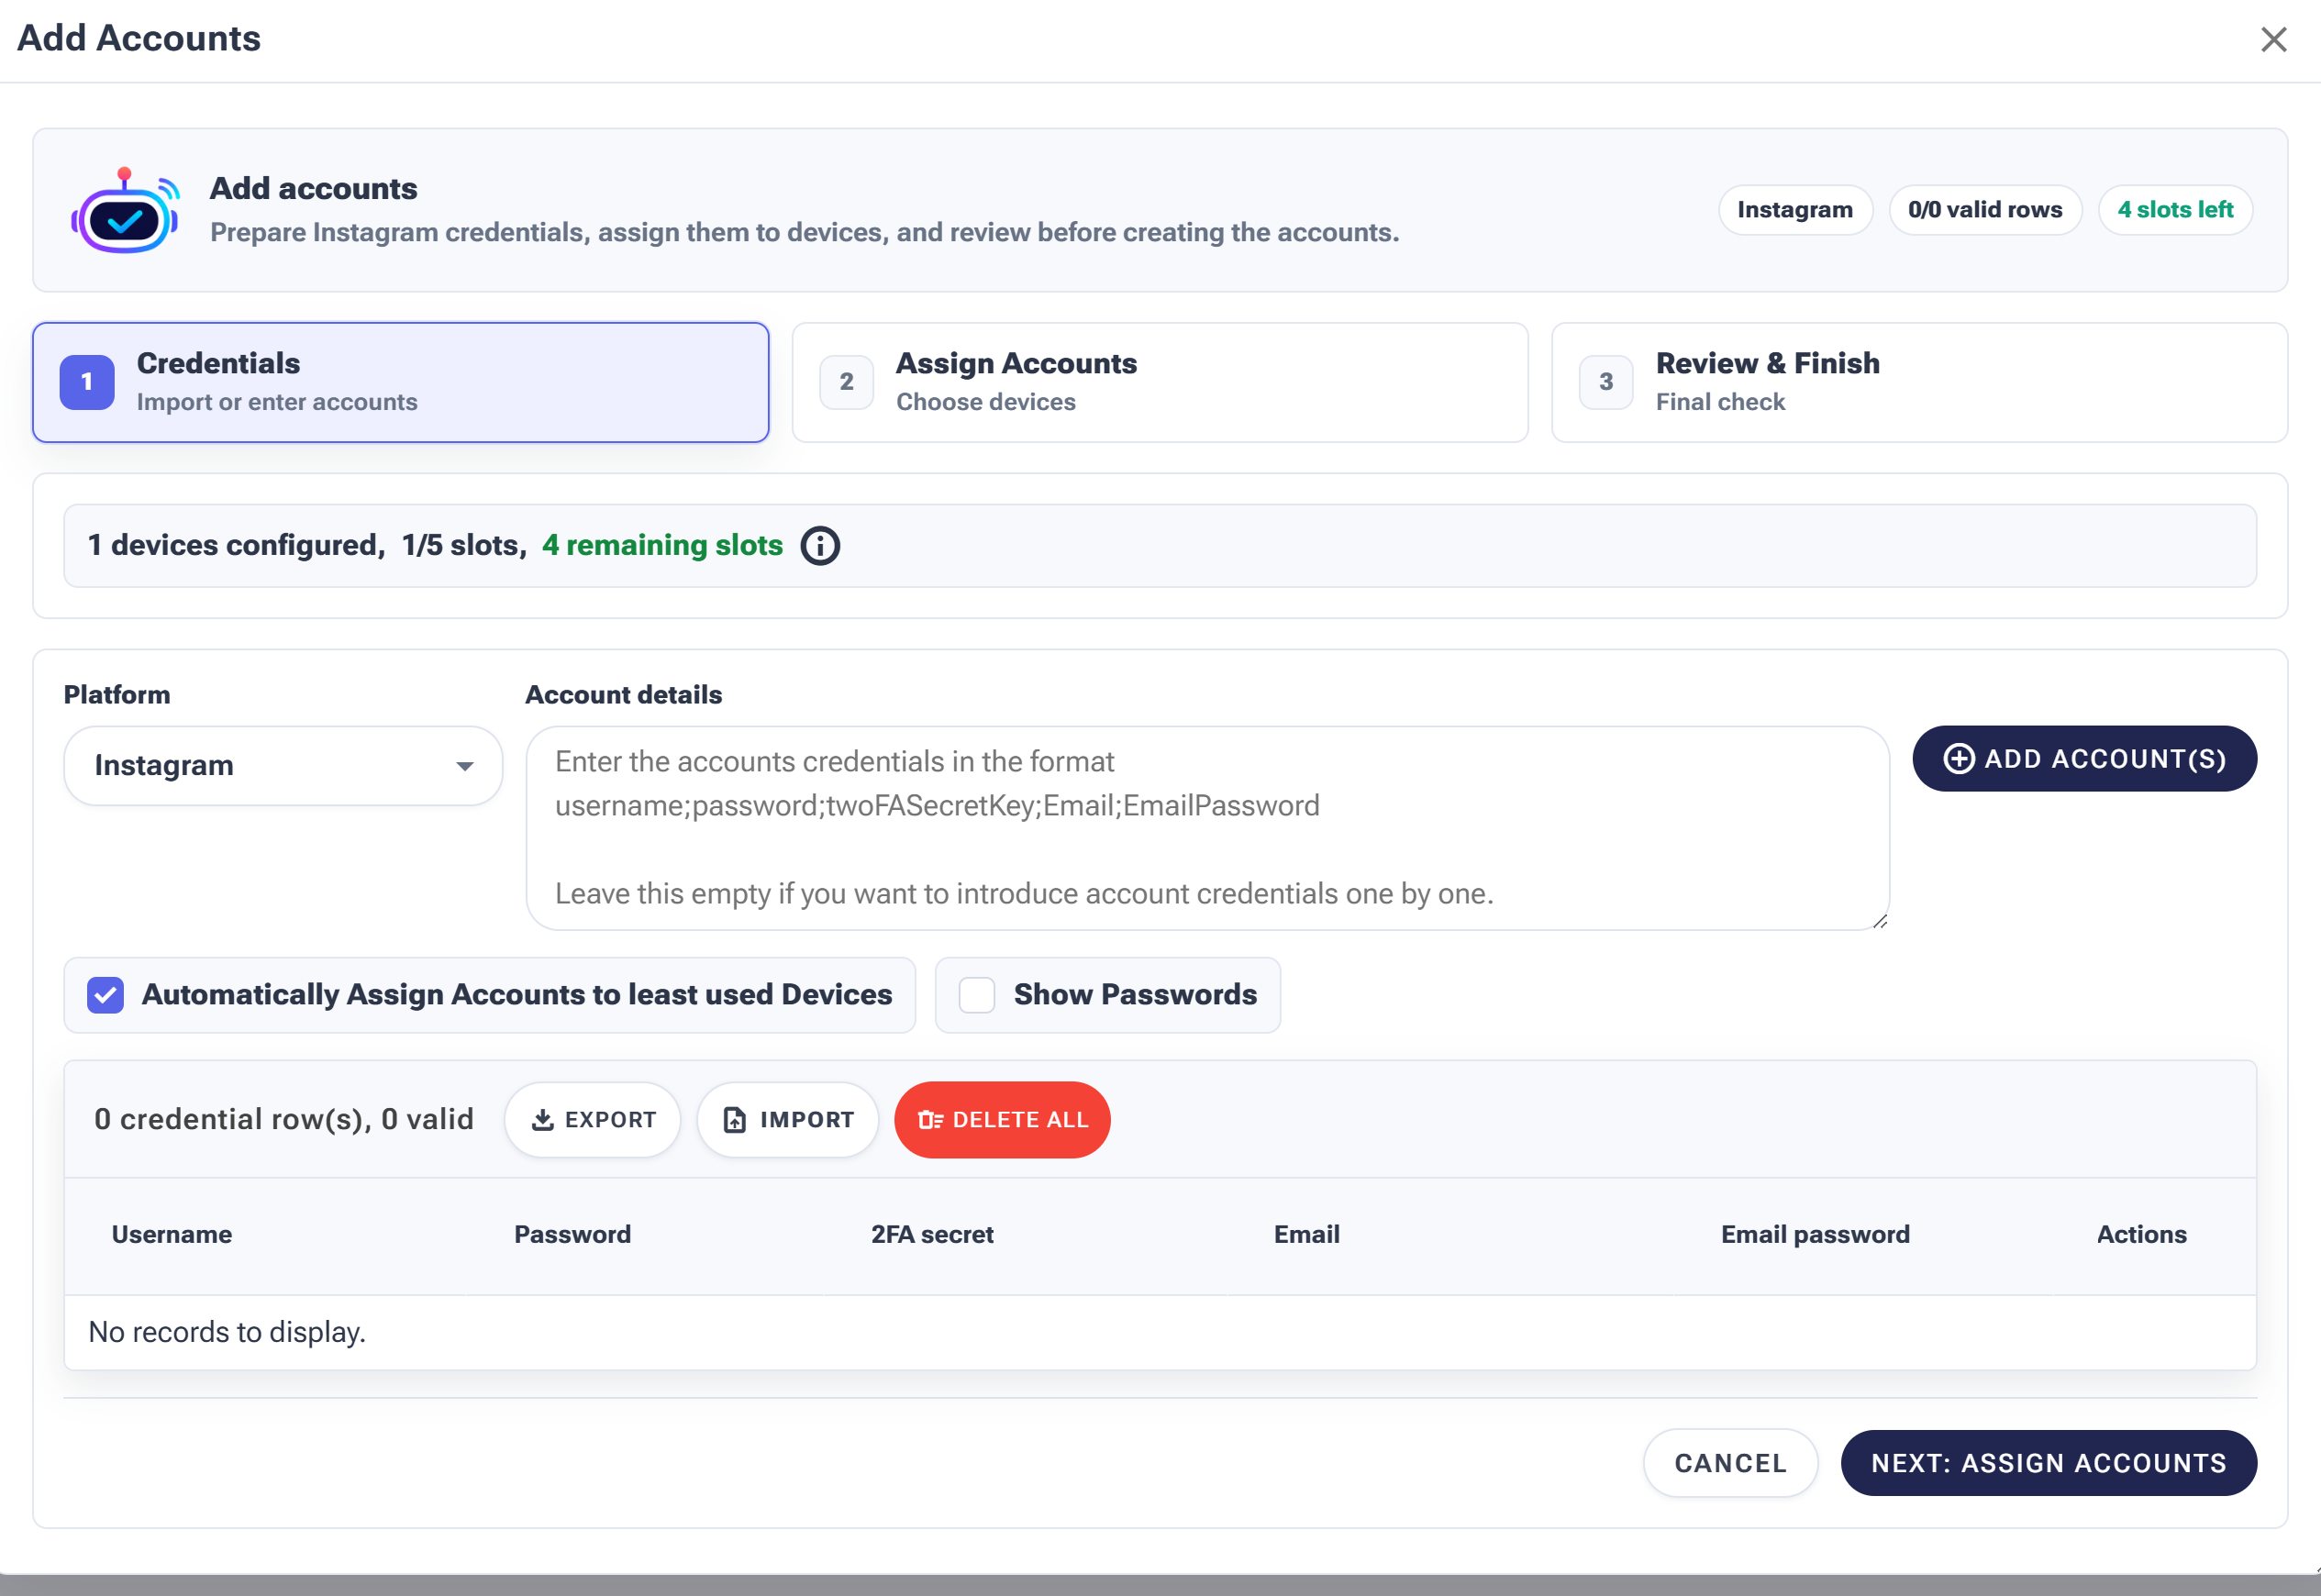
Step 1 of the wizard — pick a platform, then add accounts in bulk or one at a time.
Choose the Platform, then add accounts one of two ways:
- In bulk — paste one account per line in the format
username;password;twoFASecretKey;Email;EmailPassword, then click Add account(s). Each line becomes a row in the table below. - One at a time — leave the box empty and click Add account(s) to get a blank row, then type each field straight into the table.
Other controls here: Automatically assign accounts to least-used devices spreads new accounts evenly across your phones, Show Passwords reveals what you typed, and Import / Export move credential lists in and out. The slots counter (top-right) shows how many accounts your plan and connected devices allow.
Step 3: Only username & password are required
Only Username and Password are mandatory — the other three fields are optional but recommended.
To save an account you only need a username and password. The other fields are optional, but adding them makes logins far more reliable:
- 2FA secret key — if the account uses two-factor authentication, this lets SMTasker generate the code itself and pass the checkpoint without stopping for you.
- Email & Email password — let SMTasker open the mailbox and confirm an email verification prompt automatically when a platform asks for one.
Step 4: Assign each account to a device
Click Next: Assign Accounts. Every account has to live on a physical phone — that’s the whole device-based model — so this step is where you choose which one. Pick the device where the account should log in and get connected — and, if you’re running clones, the app package it should use (more on that just below).
Each row assigns the account to a device (here, p3q) and an app package. When it shows Ready, you’re set to continue.
Two ways to assign:
- Automatic — leave Auto-assign to least-used devices ticked (from Step 2) and SMTasker spreads accounts across your phones for you. Best default for most people.
- Manual — choose the device per account. Do this when it matters which phone an account lives on: keeping one client’s accounts together, or keeping a fragile aged account on a phone by itself.
Choosing the app: Original or a cloned app
Look at the Package column in that table. It sets which app the account actually opens and logs into on the phone. By default it’s Original — the standard app already installed on the phone.
The Original app can actually hold several accounts on its own — the Instagram app, for example, lets you sign in to up to five in one app. We don’t recommend that — for safety. When several accounts share one app, they also share the same device details, so the platform can see they’re all on the same phone and link them together — and once accounts are linked, a problem with one can spill onto the others. A cloned app avoids this: each clone is a separate copy of the app (with its own package name, like com.instagram.androig) that changes those device details, so every account looks like it’s running on a different phone. That’s why we recommend one account per cloned app — each account gets its own device fingerprint and looks completely independent.
Open the Package dropdown to send the account to the Original app, or to one of your cloned apps.
Each clone is single-use here: as soon as you assign a cloned app to an account, it drops off the Package dropdown — so the next account you set up picks a different clone, and you naturally end up with one account per app.
Once each account points at the right device and package and shows Ready, click Review & Finish.
Step 5: Review & finish
The final screen is a plain summary — account, platform, device and profile. Click Finish Adding Accounts to create them.
The last screen lists every account with its device and platform. Thirty seconds here saves real pain later: a typo’d password or an account on the wrong device is trivial to fix now and annoying to untangle after automations have started. When it looks right, click Finish Adding Accounts.
What happens next: PendingLogin → Valid
The new account is created as PendingLogin, then flips to Valid once the phone completes the login.
Right after you finish, the account appears on your Accounts page with a PendingLogin status — it exists in SMTasker, but hasn’t signed in yet.
SMTasker then performs the login on the assigned phone. If it succeeds, the status changes to Valid and the account is ready to automate. If the account had a 2FA secret or email attached, SMTasker uses them to clear any verification checkpoint on its own; if not — and a checkpoint appears — the login waits for you to help.
A few things that keep logins smooth
- Use current credentials. Change a password before adding the account, not after — a stale password is the most common reason a login fails.
- Add the 2FA secret key for any account with two-factor turned on, so logins don’t stall on a code prompt.
- Spread accounts across devices where you can — it’s both safer and easier to manage than stacking everything on one phone.
- Give a proxy to accounts that need a clean IP. See the Proxy Manager for multi-account setups.
Once your accounts show Valid, head to Creating Automations to attach your first tools — or read Managing Your Accounts to organise them with tags and check restrictions.