6 – Run Your First Phone Automated Actions
Launch your first engagement automation — pick a tool, set safe limits, press Start, and watch the actions roll in.
So you’ve got your phone plugged in and showing up on the SMTasker dashboard – awesome! Now comes the fun part: setting up your first automated actions and watching your phone do the work for you.
We’ll walk you through it step by step so nothing gets confusing. Let’s go!
Prefer to watch? This step is also covered on our YouTube channel — the written guide below matches it exactly.
Step 1: Go to the Automations Page
On the left sidebar of your web dashboard, click Automations. This is your command center – it’s where all your automated actions live.
If this is your first time here, the page might look empty. That’s totally normal – we’re about to fix that.
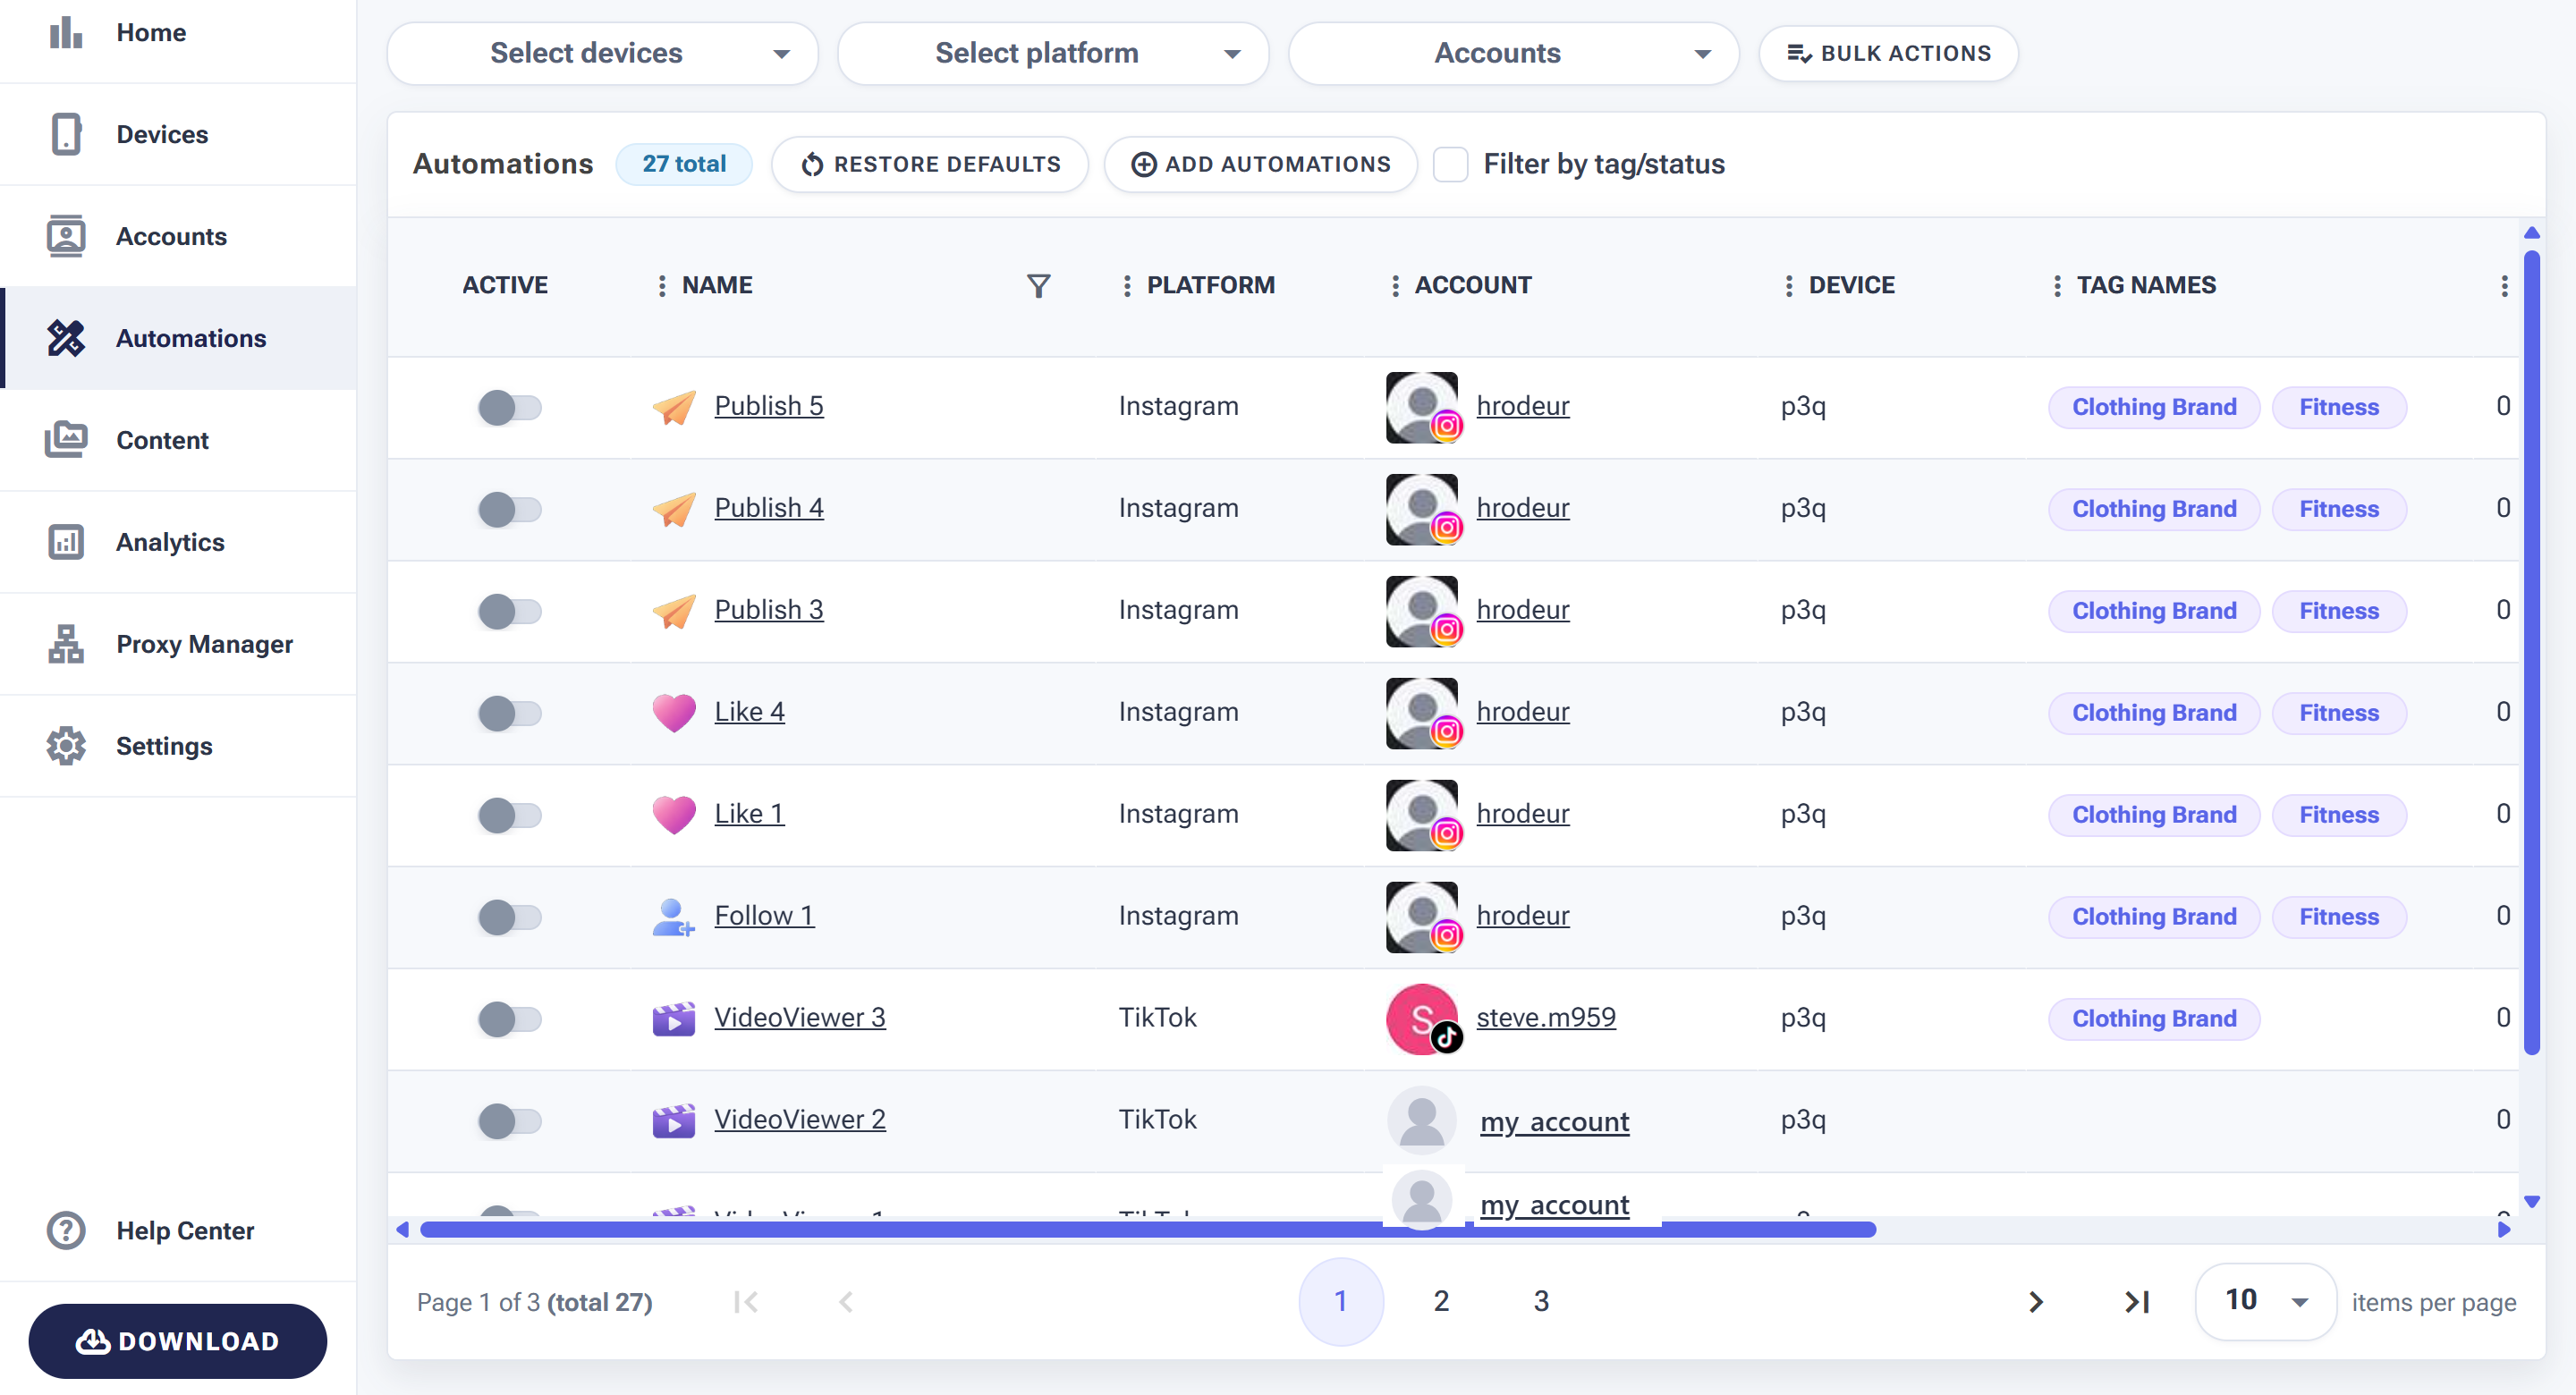
The Automations page is your command center — every tool you add lives here.
Step 2: Add Your First Automations
At the top of the Automations page, you’ll see an ADD AUTOMATIONS button. Click it.
- Pick Your Platform: First, choose the platform you want to automate from the dropdown – either Instagram or TikTok. Pick whichever one matches the account you’ve got logged in on your phone.
- Select Your Account: Next, use the Select accounts dropdown to pick which social media account these automations should run on. This is the account SMTasker detected from your phone when you plugged it in.
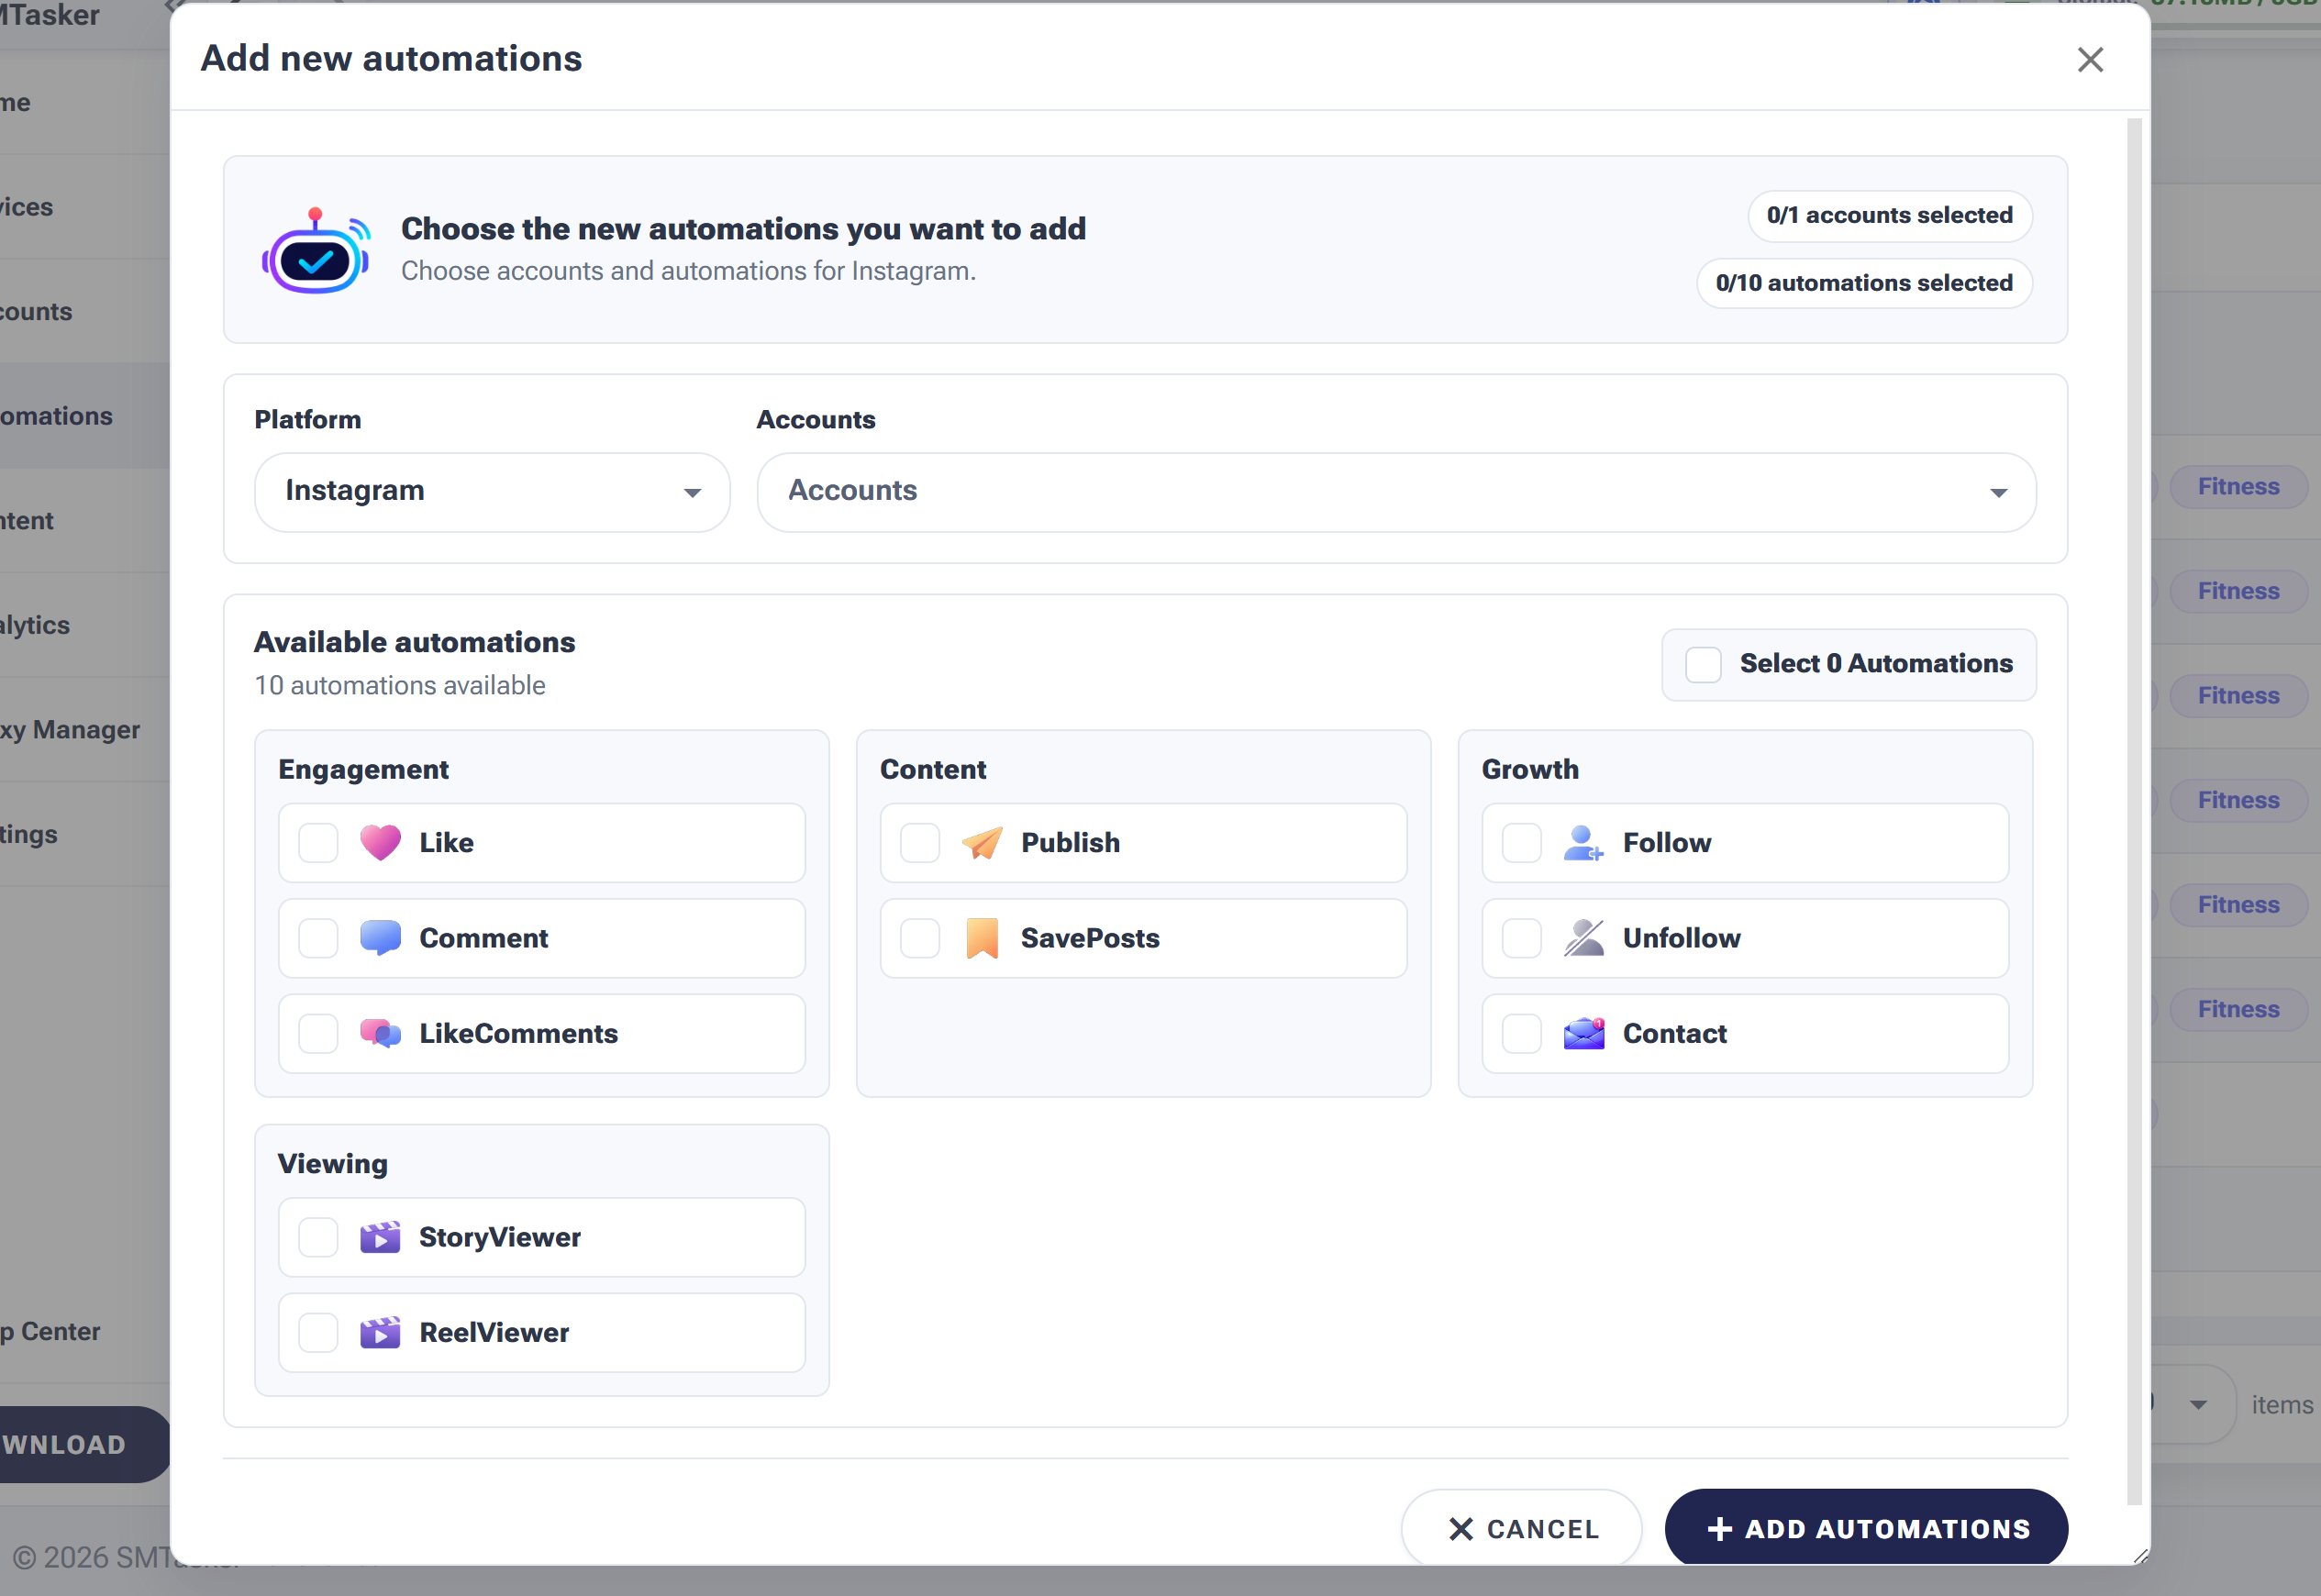
Adding automations: pick the platform, choose the account, tick the tools you want.
3. Choose Your Automations: Now the fun part – check the boxes for the actions you want to automate. Here’s what each one does:
-
- Like – Automatically like posts based on hashtags, users, or your explore feed
- Follow – Follow users from specific sources
- Unfollow – Unfollow users you’ve previously followed
- Comment – Leave comments on posts
- Contact – Send direct messages
- Save Posts – Save posts to your collections
- Story Viewer – View stories automatically
- Reel Viewer – Watch reels automatically
- Like Comments – Like comments on posts
- Publish – Schedule and publish content to your accounts.
Check the automations you want, then hit the ADD AUTOMATIONS button at the bottom of the popup. Done!
Step 3: Configure Your Automation Settings
Now you’ll see your new automations listed on the Automations page. Click on any automation name (for example, Like) to open its settings.
You’ll land on the SETTINGS tab with a few important things to configure:
Status Toggle
At the top you’ll see a STATUS toggle. This controls whether the automation is active or paused. Leave it off for now while we finish setting things up – we’ll turn it on in a minute.
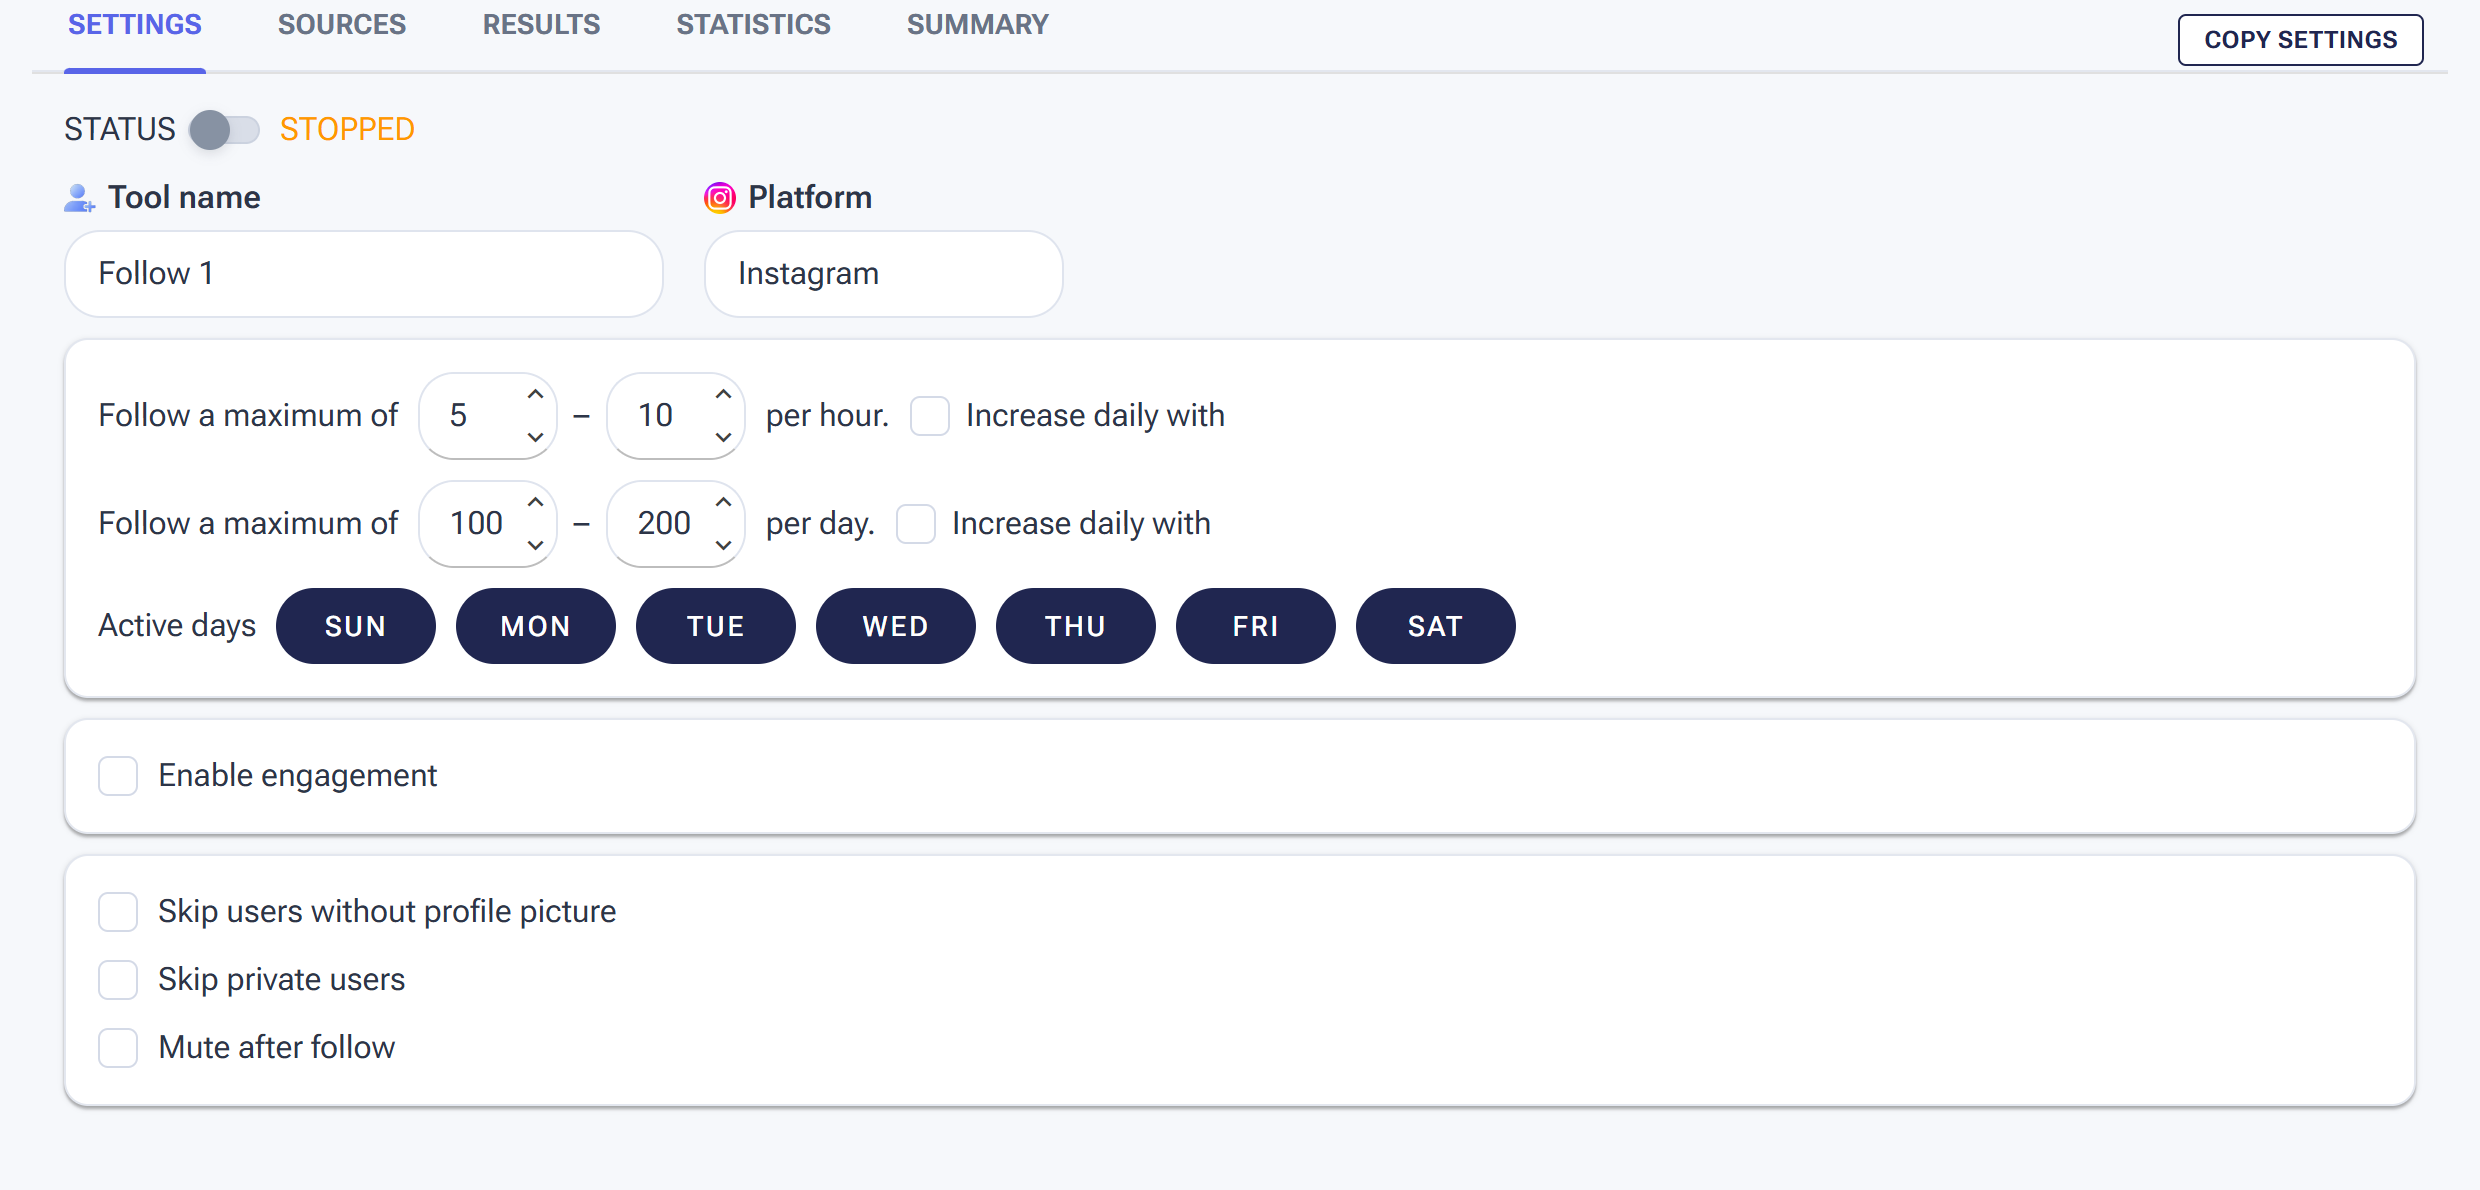
The Settings tab: status toggle, hourly and daily limits, and active days.
Rate Limits
This is important – it controls how fast your automation runs. You’ll see two settings:
- Per hour: How many actions to perform per hour. Example: 5–10 per hour.
- Per day: The maximum number of actions per day. Example: 50–100 per day.
Important: Don’t go crazy with these numbers! Start low and slow. Social media platforms can flag accounts that do too many actions too fast. We recommend starting with 5–10 per hour and 50–100 per day when you’re getting started. You can always increase later once things are running smoothly.
Active Days
Pick which days of the week the automation should run. All days are selected by default (SUN through SAT), which is usually fine. But if you want your account to look more natural, you could turn off a day or two – real people don’t usually engage 24/7.
Engage With Profile:
When checked, the automation will show you three boxes you can check from:
- Just browsing: This is a “passive-only” mode. The system will only watch posts from the profile without performing any outward interactions like likes or views on temporary content.
- Open to interaction: A moderate approach. The system will view a few stories and reels and will occasionally leave a “Like” to maintain a natural presence.
- Want to connect: The most active setting. This increases the frequency of interactions, viewing a higher volume of stories and reels and consistently liking content to build a stronger connection with the profile.
Step 4: Add Your Sources
Now click the SOURCES tab. This is where you tell the automation where to find users to interact with.
Depending on the automation, you’ll see different source types. For example, the Like automation gives you:
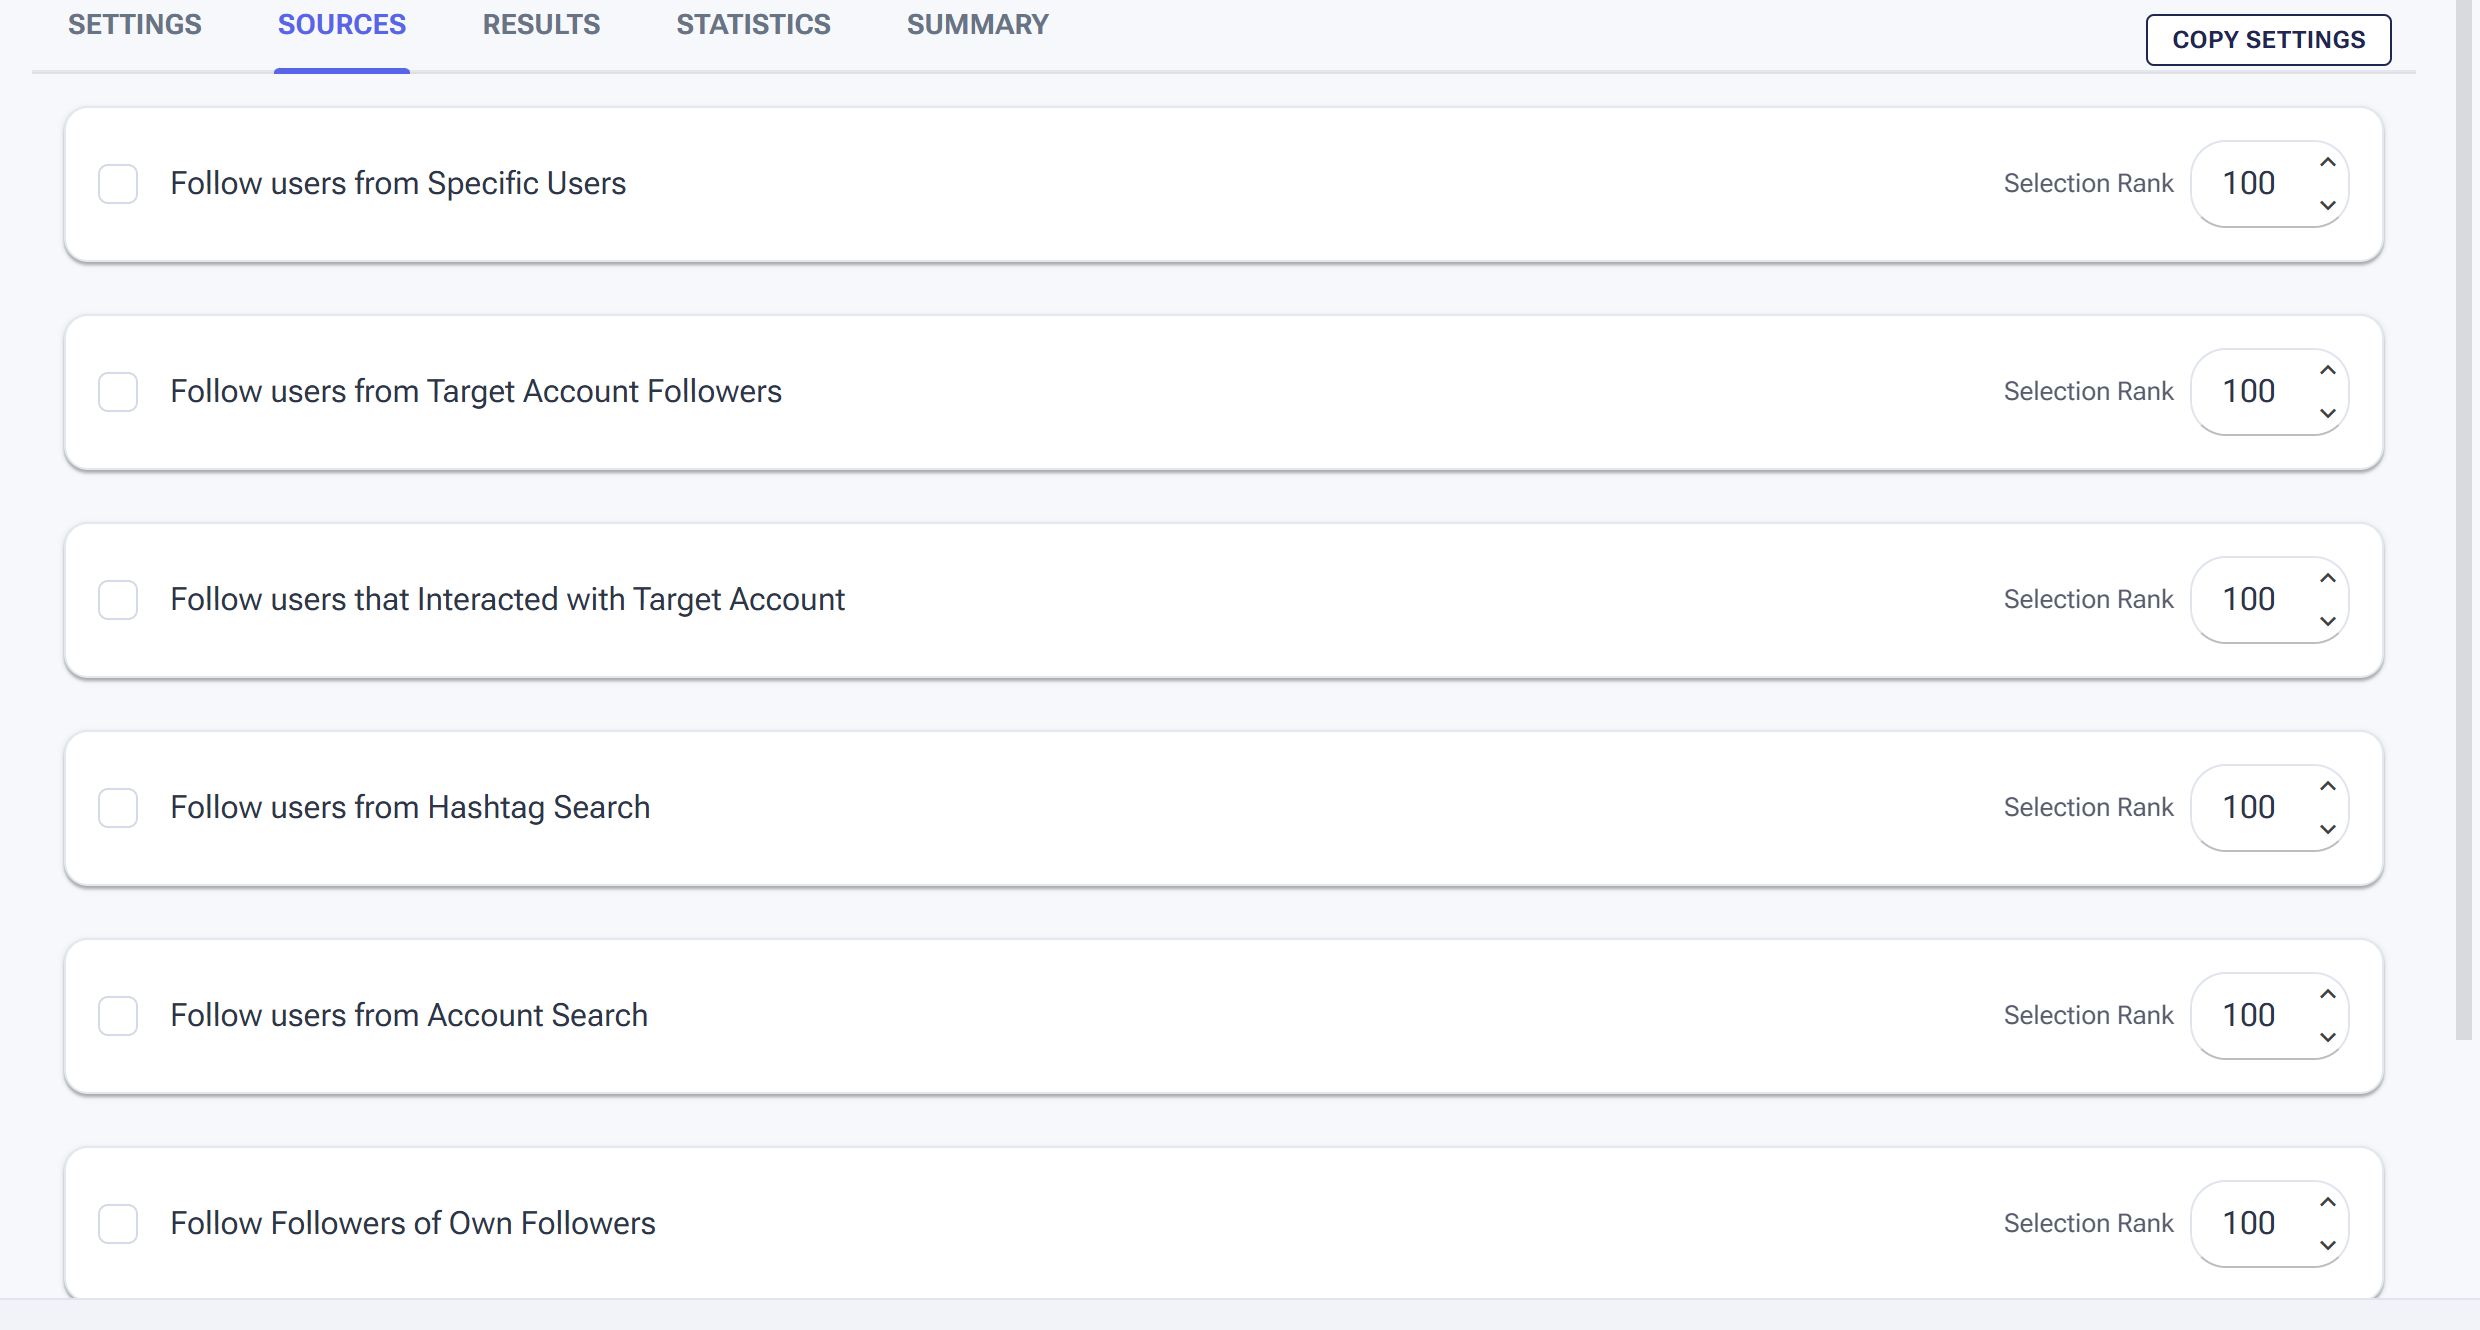
The Sources tab tells the tool where to find content — usernames, keywords, or hashtags.
Like Posts from Specific Users
Type in usernames (one per line) of accounts whose posts you want to like.
Hit ADD USERNAMES to save them.
Like Posts from Account Search
Search for accounts by keyword. SMTasker will find accounts matching your keywords and like their posts.
Like Posts from Hashtag Search
Type in hashtags (one per line, use # for hashtags, e.g., #nature). SMTasker will find posts with those hashtags and like them.
Hit ADD HASHTAGS to save them.
Like Posts from Explore Feed
Enable this to like posts that appear in your explore/discover feed. It’s a great hands-off option since the platform’s algorithm does the targeting for you.
Step 5: Turn It On!
Now that your settings and sources are configured, go back to the SETTINGS tab and flip that STATUS toggle to ON. You’ll see it change to STARTED in green.

Flip Status to ON and the label turns green: STARTED.
That’s it – your automation is now live! SMTasker will start performing actions on your phone automatically based on the schedule and limits you set.
Repeat this for any other automations you added. Configure each one with its own settings and sources, then toggle them on when ready.
Step 6: Monitor Everything from the Dashboard
Head back to the Dashboard (click it in the left sidebar) to see everything running in real time.
Phones Dash
Click the PHONES DASH tab to see your phone’s status at a glance. You’ll see a phone card showing:
- Online/Offline status – Whether your phone is connected
- Accounts On – How many accounts are active
- Automations On – How many automations are currently running
- 7d actions – A mini chart showing your action count over the last 7 days
What’s next?
Now that you’ve mastered basic interactions like likes and follows, it’s time to automate your content strategy. In the next guide, we’ll show you how to set up a Publishing Campaign to automatically post images, reels, and stories directly from your phone, complete with AI-generated captions and custom scheduling.