Keep the useful part. Shape the ending.
Audio Trimmer & Fade Editor
Prepare a clean audio excerpt from a local file. Choose the start and end, adjust the level and add linear fades before downloading a WAV for your edit.
A deliberate cut, with measurable settings
Make the excerpt fit the next step.
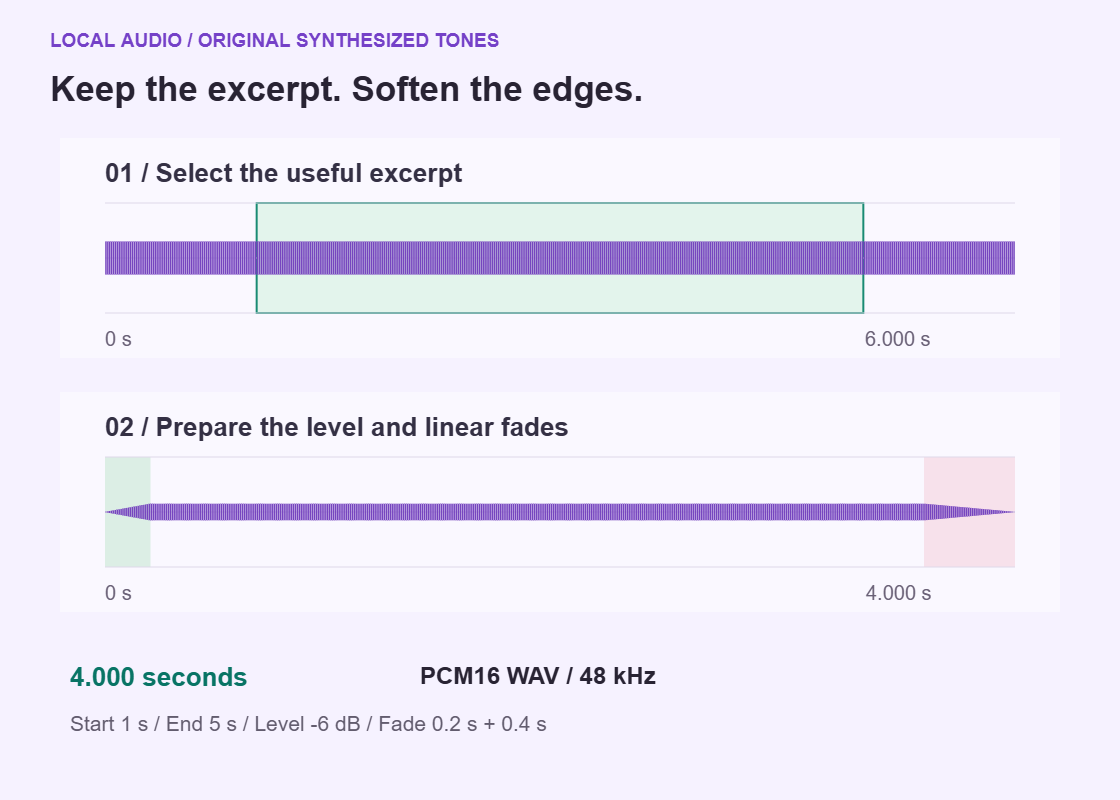
Original synthesized tones, not a customer recording or a loudness recommendation.
Start with a local audio-only file
Choose the excerpt. Listen before exporting.
Times refer to the prepared 48 kHz source. WAV is an editing asset; native posting and codec support depend on the destination and browser.
Your audio and edit choices
No audio selected.
Leave End time empty to use the prepared source end. Choose 0.25-120 seconds. Fades must not overlap. A level above full scale is refused rather than silently clipped.
Your prepared WAV
Choose audio or load the example to see its waveform.
Sample peak and RMS are measurements, not LUFS, true peak or a mastering score. Changing an edit makes previous exports unavailable until you prepare it again.
No audio is saved in settings or reports. Settings JSON keeps your edit choices, title and note, not the recording or original filename. PDF includes a waveform, measurements and JSON review data. Inspect your title and note before sharing. PDF pages are rasterized.
Local audio-only source up to 32 MiB and 180 seconds, mono or stereo. Supported decoding depends on your browser. Prepared output: 48 kHz, 16-bit PCM WAV, up to 120 seconds and 24 MiB. PCM can be larger than compressed input. No source upload, recording, denoise, AI, video extraction or automatic posting; ordinary site assets still load. Reloading requires selecting the source again.
How the edit is prepared
Set a range. Shape the level. Verify the file.
A prepared sample timeline
The source is decoded at 48 kHz. Start and end select whole prepared frames; an empty end uses the source end.
Linear fades and level
The selected audio passes through the chosen gain and fade envelope. Overlapping fades and over-scale output are refused.
An actual WAV handoff
The output is encoded as PCM16 WAV and decoded again to verify its duration, channels and measured levels.
Give the workshop welcome one clear job
Imagine a community workshop has supplied a 47.6-second spoken welcome. It includes a microphone check, the introduction, and a conversation about where to put the chairs. The editor needs a 20-second opening for a workshop video, not a condensed version of every sound in the recording. First listen for a complete welcome that names the workshop and tells participants what happens next. Keep those essential words together. The useful result is a small, understandable audio asset that another person can place against pictures, with enough space around the speech to avoid an abrupt entrance or a hurried ending.
For this worked example, suppose the wanted passage sits between 6.400 and 26.400 seconds. The first spoken sound begins around 6.580, and the final word finishes around 25.700. These are invented timings for a supplied recording, not boundaries that the tool detects. They leave a little room before the voice and a longer settling space after it. Write down the intended sentence before making the cut, then compare it with what you hear. A 20-second file that loses the workshop name is less useful than a slightly longer draft that preserves the reason for the welcome.
Treat the platform selection as a production label rather than an audio specification. Choosing Instagram, Facebook, LinkedIn, or another context does not change the export codec or certify a destination upload. This editor produces a separate WAV for a video timeline or another agreed audio handoff. It does not assemble the workshop video, add a title card, attach captions, or send anything to an account. Decide who will complete those steps while the job is small. A clear division between preparing the voice and finishing the video prevents a successful audio download from being mistaken for a finished post.
Load a suitable audio source and inspect the default range
Choose one local audio-only file no larger than 32 MiB and no longer than 180 seconds, with one or two channels. Supported source containers include WAV, MP3, M4A or audio-only MP4, OGG, FLAC, and audio-only WebM when the browser can decode the actual codec. An extension alone does not prove compatibility. Video tracks, multiple audio tracks, empty files, and unsupported material are rejected. If the welcome exists only inside a video, obtain a separate audio source through your existing production process first. This page does not extract the track, record a microphone, or fetch a recording from an external URL.
The prepared source uses 48000 Hz, so decoding can resample an original made at a different rate. The accepted original sample-rate range is 8000 to 192000 Hz, but that is not a promise to preserve its rate in the download. Mono stays mono and stereo stays stereo. Keep the supplied original in your own project folder because the editor does not overwrite it or become its archive. Listen to both channels of a stereo source when checking the material. A quiet left channel and a noisy right channel are still part of the source; choosing this tool does not rebalance them.
A new valid source starts with the first 30 seconds selected, or the whole source when it is shorter. That initial range is a convenience, not an editorial decision about the workshop welcome. Inspect Start time (s) and End time (s) before preparing anything. A blank End time means the end of the prepared source, which could exceed the permitted output duration. Confirming a new source replaces the previous source and resets the edit settings except for the Preparing for selection. A rejected file or canceled selection retains the previous valid work, so check which recording is actually loaded rather than assuming every selection replaced it.
Set the trim by listening, then understand its exact boundaries
Enter 6.400 in Start time and 26.400 in End time for the hypothetical welcome. The difference is 20 seconds. Listen for the first consonant, the full final word, and any spoken aside just outside the selection. The waveform shows real decoded audio samples summarized for display, but it cannot identify the workshop name or decide whether a breath belongs to a sentence. A small-looking sound can carry a crucial consonant. Move the boundary based on what the recording means, then use the waveform to orient yourself. Do not remove every quiet gap simply because the display makes it look expendable.
The requested times are applied to prepared sample frames. Start uses the first frame at or after the requested start; End time is exclusive and uses the corresponding upward-rounded frame, bounded by the source end. At 48000 Hz, the example starts at frame 307200 and ends before frame 1267200, keeping 960000 frames. Actual duration comes from that frame count divided by 48000. The controls accept millisecond precision, while one prepared sample frame lasts about 0.0208 milliseconds. That distinction explains the processing method; it does not make a numerically precise cut automatically correct for the words being spoken.
The actual retained clip must be between 0.25 and 120 seconds and remain within the prepared source. An impossible range is not silently moved into bounds. If an imported End time extends past a different recording, correct the setting rather than assuming the tool has chosen a sensible replacement. Start and end also define one continuous excerpt: this is not a multitrack editor that removes an interruption from the middle and joins two sentences. If a cough divides the wanted welcome, select another complete take or handle that more involved edit elsewhere before returning with a suitable single audio file.
Put fades in spare sound rather than across important speech
For the workshop example, try Fade-in (s) at 0.080 and Fade-out (s) at 0.400. Relative to the selected clip, the entrance fade finishes at 0.080, before the first spoken sound around 0.180. The exit fade starts at 19.600, after the last word finishes around 19.300. Those choices use the available room instead of making the voice gradually disappear during an instruction. They are starting values for this imaginary take, not universal speech settings. Play the beginning and ending in isolation, then hear the whole welcome to decide whether the transitions feel natural in context.
Both fades are linear changes in amplitude, not automatic noise removal. Fade-in moves from zero toward the chosen level over its affected samples, while Fade-out moves from that level to zero. The first or last affected output sample reaches zero at the appropriate edge. Each control accepts 0 to 10 seconds, and their combined lengths cannot exceed the actual clip duration. A zero value means no fade on that edge. There is no overlap mode or crossfade between different recordings. If two long fades leave no useful steady speech, revise the edit rather than expecting the tool to preserve clarity automatically.
A fade can soften a boundary but cannot restore a missing syllable. If the start already cuts into the welcome, lengthen the selection before increasing Fade-in. If the final word sounds swallowed, move End time later or shorten Fade-out. Listen for room sound as well as voice: an abrupt jump from a busy room to absolute silence may still feel conspicuous in the finished video. This editor does not extend room tone, synthesize missing ambience, or repair existing distortion. The workshop editor can make the final transition against pictures and any surrounding sound after receiving the deliberately prepared excerpt.
Adjust Level (dB) without confusing gain with loudness repair
Begin with Level (dB) at 0.0 so the first comparison changes only the boundaries and fades. If the welcome needs attenuation, a setting of -3.0 dB multiplies its amplitude by about 0.708 before the fade envelope is considered. For an illustrative sample with amplitude 0.8 outside the fade regions, that becomes about 0.566. This is a fixed level adjustment applied to the excerpt, not a system that raises quiet words while holding loud words steady. It will not remove a chair scrape behind the speaker or separate the welcome from other people talking in the same recording.
The available level range is -24.0 to +12.0 dB in 0.1 dB steps. Positive gain is not free clarity: if the processed floating-point signal exceeds full scale, the tool refuses the output and asks for a lower level. It does not silently clip the samples or apply an undisclosed limiter. Reduce Level (dB), prepare again, and listen. Lowering a recording that was already distorted does not undo that distortion. When the source has damaged speech, a cleaner supplied take is more useful than a formally valid WAV that faithfully preserves the same audible problem at a smaller amplitude.
Sample peak and RMS are measurements of the actual exported samples after the WAV is decoded again. Sample peak describes the largest sample magnitude, while RMS summarizes signal energy across the measured material. Neither is integrated LUFS, a true-peak measurement, or a certificate of platform compliance. Silence can have an unknown or null decibel result rather than a meaningful finite reading. Use the figures to understand this file and to notice unintended changes between revisions. Judge speech intelligibility by listening, and leave any mix-wide loudness decisions to the workflow that combines this welcome with the rest of the video.
Prepare the result and compare the actual audio
Press Prepare audio after entering the desired range, fades, and level. The tool builds a real PCM16 WAV and checks the resulting file rather than offering only a visual preview. Use Original audio and Prepared WAV deliberately; neither player starts automatically. Compare the opening against the supplied welcome, then check the last word and the remaining pause. Finally play the complete prepared version without watching the waveform. That last pass helps reveal an edit that looks tidy but sounds rushed. Keep playback volume reasonably consistent when comparing revisions so a louder listening setting does not masquerade as a better edit.
Changing an input makes the old prepared result stale. Downloading the previous WAV or its PDF, CSV, TXT, or copied review is disabled until a new valid preparation succeeds. This matters when a reviewer asks for just a small correction, such as another tenth of a second after the workshop name. Make the change, press Prepare audio again, and listen to the rebuilt result. Do not assume that the player or report from an earlier revision now represents the visible settings. Review the title and note as part of the same handoff because those authored details appear in review exports.
Bring the approved WAV into the video editor and place it against the actual opening pictures. A spoken instruction to move to a table should not accompany a shot of people leaving the room. Check the first visible action, the end card, and the transition into the next scene. If written captions are needed, the Add Subtitles to Video tool is a separate step using a finished video and supplied subtitle text. This audio editor does not transcribe the welcome or synchronize captions. Inspect the final video in its intended destination after assembly; a local audio review cannot show that presentation.
Download the WAV and send a review that explains the choice
Download WAV gives you 16-bit PCM audio at 48000 Hz with the source channel count preserved. Output is limited to 120 seconds and 24 MiB. PCM can be larger than a compressed MP3 or M4A source even when the excerpt is shorter, because the representation has changed. The 20-second workshop example contains 1920000 bytes of mono sample data, or 3840000 bytes for stereo, plus the WAV container overhead. Those are payload calculations, not a promised total download size. Read the measured bytes for the actual export when planning the handoff, and keep the original supplied recording separately.
Send the audio file to the person who will use it, not just the review document. Copy edit notes, Download CSV, and Download text provide complete review data about settings and measured output. A useful note might say that the welcome retains the workshop name, leaves the final instruction intact, and is approved for the opening scene only. Keep private participant details out of that note if the report will circulate more widely. The source filename is excluded from these reports, but the title and note are authored content, not automatically anonymized fields. A neutral filename does not make a revealing note private.
The styled PDF provides a visual review with waveform, settings, and measurements. Its pages are rasterized, so use TXT or the copied review when selectable text is needed. The PDF attaches complete settings and review JSON, but neither attachment includes the audio or source filename. It is therefore not a listening copy or a portable audio project. Keep the WAV beside it in your external delivery folder and identify the matching revision yourself. If someone receives only the PDF, they can review documented choices but cannot reconstruct the spoken welcome from the attachment, even when every numeric setting is available.
Keep reusable settings separate from the recording
Save settings stores the platform context, Edit title, Review note (optional), range, fades, and level in JSON. It does not store audio, the source filename, or measured results. Open settings retains whichever audio is currently loaded; it does not prove that this is the recording used when those settings were saved. For the workshop, keep an external record linking the approved WAV, source revision, and settings file. On reopening, listen to the loaded source and check the time range before preparing again. A file with the same duration can contain a different take, so valid numeric settings alone cannot establish that the welcome is unchanged.
The input recording is processed locally without uploading it, and there is no autosave. Normal website assets and the public example can still load; local processing does not mean the whole website is offline. Leaving the page releases decoded audio and output buffers. Browser Back may retain the selected local File in page memory and offer Restore audio, but that is not durable storage. Restoration is explicit and can fail or be canceled. A reload requires selecting the source again. Download the approved WAV and settings while the work is available rather than relying on browser history as an archive.
For the next workshop, reuse the review questions before reusing the numbers: does the clip introduce the right event, preserve the complete instruction, and fit the actual opening scene? A different speaker may need different boundaries and no fade at all. The Content Repurposing Planner can help separate future video versions and their handoff tasks without editing the audio itself. When supported account routines become the recurring burden, SMTasker is a separate option for schedules, limits, and logs. Neither this WAV nor its settings directly imports into SMTasker or automatically updates a post, account, or app setup.
Choose the production context
Platform and audio-editing guides
Each guide follows a different spoken or instrumental example. They prepare an asset for a wider edit, not a universal native WAV upload.
Instagram Audio Trimmer
Prepare a process-video voiceover without losing the breath or consonant that makes the instruction clear.
Read the guideTikTok Audio
Cut a concise repair tip, audition its opening and keep the finished WAV as an editing asset.
Read the guideYouTube Audio
Separate a lesson introduction from music-bed decisions and preserve the words that explain the demonstration.
Read the guideFacebook Audio Trimmer
Give a volunteer announcement a documented clip, level and revision for a clear team handoff.
Read the guideLinkedIn Audio Trimmer
Review a client-demo narration with accountable settings instead of assuming a louder file sounds more professional.
Read the guideThreads Audio
Prepare a field-note audio asset for a separate video edit, not a promised native audio post.
Read the guideX Podcast Audio
Build a podcast-promo excerpt without removing the context that makes the speaker understandable.
Read the guideSnapchat Audio
Make a garden-tour voiceover transition deliberate before assembling the destination video.
Read the guideReddit Tutorial Audio
Keep a tabletop tutorial instruction complete and carry the clip choices into the discussion handoff.
Read the guideAudio Fades
Understand a linear fade envelope, its endpoints and what it cannot repair in an already damaged source.
Read the guideKeep Words Complete
Use listening and prepared sample timing together rather than asking a waveform to identify words.
Read the guideQuestions about preparing your audio
Can I trim an MP3 and download another MP3?
You can use a supported MP3 source when the browser decodes it, but the download is PCM16 WAV at 48000 Hz. There is no MP3 or AAC export. The WAV can be larger than the compressed source.
Does the trimmer find word boundaries automatically?
No. Set Start time and End time manually and listen to the result. The waveform comes from actual audio samples, but it does not identify words, breaths, or sentence meaning.
Why is Download WAV unavailable after I change a setting?
The earlier output no longer represents the current inputs. Press Prepare audio again and resolve any validation error before downloading the rebuilt WAV or its review exports.
Does saving settings keep my recording?
No. Settings JSON contains edit choices, title, and note, not audio, source filename, or metrics. Keep the original and approved WAV separately. Opening settings retains the currently loaded audio and may require correcting the range.
Can I upload this WAV directly to every social platform?
No universal native WAV upload is promised. Use it as an audio asset in a video editor or an explicitly accepted separate audio handoff. Review the assembled video in the actual destination yourself.
A routine beyond one workshop
Test a more organized account workflow
Try SMTasker for 5 days with Android devices and a Windows or macOS client. Review supported actions for your accounts; this free editor does not import audio settings or publish WAV files.