Make the important detail easier to find
Image Annotator
Add arrows, outline shapes and numbered steps to one local image. Make a tutorial, explain a detail or prepare a clearer feedback image.
A picture with a clear point
Show where the reader should look.
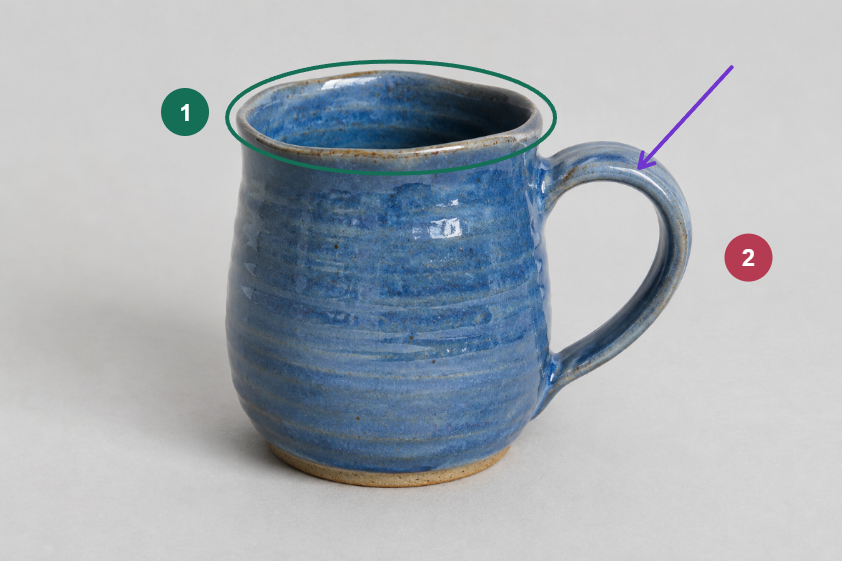
A synthetic studio photo, annotated with this tool. Numbers are artwork; mark names stay in the separate review.
Point. Outline. Explain.
Make your image easier to follow
Use pointer drawing or exact numeric positions. Your original file stays unchanged; downloads contain the flattened annotated result.
Your marks and positions
No image selected.
Arrows use start and end points. Outline shapes use opposite corners. Numbered circles use the start point as their center; numbers do not change when layers move.
Your image preview
Choose an image or load the example.
Draw on the Annotated preview, or edit the selected mark with the fields.
Before is a review view, not an export option. PNG/JPEG and PDF always use the annotated result without selection outlines.
Annotations are not redaction. Arrows and outlines leave image details visible. Use Image Redactor first when information needs an opaque cover.
Your image stays local. Still PNG/JPEG/WebP up to 15 MiB, 12,000 px per edge and 40 MP. Preparation may reduce it to at most 2,048 px per edge, 4 MP and a 2 MiB PNG. Coordinates and thickness refer to that prepared copy.
Settings and review exports contain no image or source filename. Keep your source separately and reselect the intended matching-dimension image before opening settings. PDF contains the annotated proof, not an original-source attachment. No source upload, API, account access, OCR, AI, hosting, automatic posting or autosave; ordinary website resources still load.
How the markup works
A clear target. A deliberate mark. A reviewed image.
Choose one useful target
An arrow points, an outline groups, and a numbered circle gives a reference for a separate explanation.
Control the actual placement
Draw directly or use tenth-percent coordinates. Review line thickness and circle size in prepared pixels.
Share the finished raster
Download the annotated image for sharing. Keep the source and settings separately when you need another edit.
Start with the question the picture should answer
An image annotator helps when a picture already contains the answer but a reader needs help finding it. An arrow can identify a small connection, a box can separate a group, and a numbered circle can connect a visible detail to an explanation elsewhere. Begin with one question rather than a collection of marks. Decide what the reader should recognize after looking at the finished image. If the explanation needs several camera angles or a sequence of changing screens, one annotated still may not be enough. This tool works on one supplied image, not a slideshow, animation, or automatically assembled tutorial.
Imagine a fictional equipment library called Harbor Shelf. A volunteer photographs a portable recording kit on a table before handing it to the next shift. The photograph shows a recorder, a coiled cable, a small adapter pouch, and a carrying case. The question is simple: which loose accessories belong with this particular kit? The volunteer wants to identify the cable and pouch without turning the photograph into an operating manual. A box around those accessories and two numbered circles can answer that question. There is no need to mark every visible object merely because more annotation space remains available.
Write a short acceptance sentence before editing: “The next volunteer can match the two loose accessories to the accompanying list.” That sentence gives every proposed mark a job. A decorative arrow toward the carrying handle would not help, so leave it out. A circle sitting directly over the adapter would hide the very detail the reader needs, so place it beside the object instead. Annotation should reduce the effort of finding evidence, not replace the evidence with colored shapes. Keep factual explanations in the surrounding message, especially when the photograph alone cannot establish compatibility, condition, or correct equipment use.
Prepare a source with enough useful detail
Select a local still file in PNG, JPEG, or WebP format with Choose image. Three source ceilings apply: 15 MiB in file size, 12000 pixels along either edge, and 40 megapixels in area. A prepared PNG becomes the working image, subject to a two MiB budget, four megapixels, and a longest edge of 2048 pixels. Preparation may reduce the source, so inspect the displayed working dimensions before judging fine detail. These limits describe the local editor, not a social platform upload policy. The original file remains unchanged on your device, and enlarging a prepared image later cannot recreate detail that was lost during reduction.
Harbor Shelf checks the small adapter pouch first. Its zipper and outline remain visible in the prepared photograph, but the tiny connector printing is not clear enough to support a model identification. The volunteer therefore writes “adapter pouch” in the external list rather than guessing the connector specification. A closer original photograph would be the right starting point if that distinction were essential. More stroke thickness cannot improve an unclear source. Before drawing anything, compare the smallest relevant feature with the whole table view and decide whether the picture can answer the chosen question at a comfortable reading size.
Look beyond the main subject before selecting the final source. A lending slip at the back of the table might show a borrower name, and a monitor reflection might reveal an unrelated conversation. Arrows and outline shapes leave those pixels visible. Prepare a separately covered source with the Image Redactor when information must be removed, then inspect that result before annotating it. Do not use a numbered circle as a privacy cover. Its size and position serve identification, not concealment, and later editing could expose the detail again. Local processing does not make visible private information suitable for sharing.
Give each mark type a clear visual role
Choose an arrow when the endpoint matters more than the surrounding area. Its tip should land near the intended feature without covering it. Choose an outline box when straight boundaries help define a group or interface region. Choose an outline ellipse when a softer enclosure suits an irregular object or small cluster. A numbered circle gives the reader a reference to a manually written key. These are four different ways to direct attention, not four effects that every picture needs. Boxes and ellipses have no filled interior, and there is no freeform text overlay, blur, automatic detection, or object recognition.
For the recording kit, the volunteer places a box around the cable and pouch together to establish the accessory group. Circle 1 sits in clear table space near the cable, while circle 2 sits beside the pouch. An arrow is useful only if the cable overlaps the recorder enough to make the reference ambiguous. An ellipse around the entire case would add little because the case is already obvious. Test each addition against the acceptance sentence. If removing a shape leaves the explanation just as clear, the simpler version is usually the stronger handoff. The tool allows up to twenty marks, not twenty required annotations.
The palette contains four fixed opaque choices: violet, forest, ink, and coral. Choose a color that remains visible against the actual source, including the sections where an outline crosses a dark edge or bright reflection. Thickness runs from two to twelve pixels in the prepared image. A heavy line may stand out while also hiding a narrow cable, so inspect that tradeoff. Do not make color alone the key to the explanation. Refer to “circle 1 beside the cable” rather than only “the violet item.” Shape, position, and written meaning should still help a reader who cannot distinguish the chosen colors.
Place shapes deliberately with pointer or coordinates
Draw mode uses a start and finish for arrows, boxes, and ellipses. For an arrow, press at the tail and release toward the tip. For a box or ellipse, drag between opposite corners; either direction can define the region. A numbered circle is placed by clicking its center. The gesture is a draft until release, and Escape can discard an unfinished gesture. Avoid drawing while also changing another field. A clear placement routine makes it easier to notice whether the selected mark is the one you intended to change, especially when several shapes sit close together in the same small area.
The coordinate fields provide a keyboard route and a way to make small repeatable adjustments. Values describe percentages across and down the prepared picture, with one decimal place available. Arrow start and end coordinates describe its two endpoints; box and ellipse coordinates describe opposite corners. A numbered circle uses its center coordinates, with diameter controlled separately. Moving the arrow tip from x 64 to x 65 changes the horizontal position by one percent of the working span, not by one source pixel. Read the preview after each adjustment rather than assuming that a neat number necessarily gives the clearest placement.
Use Move selected to translate an existing mark instead of redrawing its meaning. An arrow moves as a unit, so its direction and length remain together during that move. Keep the full shape inside the image, including stroke edges, arrowhead, or circle boundary. Very short arrows and extremely narrow outline shapes can be refused because they cannot fit their geometry clearly. Move a mark inward or enlarge its region when the editor identifies an invalid boundary. The volunteer leaves a small gap between the accessory box and the picture edge, which makes the enclosure look intentional and avoids an accidental clipped appearance.
Keep numbers, names, and stacking separate
A circle number is manual artwork text. Set it from 1 to 99 and choose a diameter from 24 to 160 prepared pixels. Adding or reordering marks does not automatically rebuild a numbered sequence. That is useful when a picture refers to an existing list, but it also means you must check the key yourself. If circle 2 becomes circle 4, update the accompanying explanation deliberately. The number identifies a reference chosen by the author; it does not establish a detected step, rank, quantity, or verified order. Keep unrelated meanings out of the same sequence so readers do not have to guess.
Mark name is different from the number inside a circle. A neutral name such as “Cable reference” helps identify the mark in the review inventory, but those words are not drawn on the image. Renaming the box “Included accessories” will not create a visible caption inside it. Harbor Shelf therefore writes the two accessory explanations in the handoff message rather than expecting review labels to appear in the exported photograph. Use short names that make sense to another editor, and avoid personal details. Review labels can appear in reports even though they are absent from the PNG or JPEG artwork.
Move earlier and Move later change stacking, not the numbered reading order. A mark drawn later in the stack may cover part of another mark where they overlap. The volunteer moves the accessory box earlier so the nearby numbered circles remain visually distinct. Their displayed values stay 1 and 2. If too many shapes need careful layering to remain understandable, reconsider the composition before refining the stack further. A cable photo should not require a complex legend simply because marks were added in an inconvenient order. Remove redundant shapes and keep the remaining references easy to follow without opening the editor.
Review the flattened artwork, not just the workspace
Before and Annotated let you compare the source with the marked preview. They are viewing choices, not export modes: image exports use the annotated result. Switching to Before does not download an unmarked original, and selection controls are not part of the artwork. Compare both views to ask whether the annotation clarifies the source or merely makes it busier. In the kit photograph, the loose cable should remain recognizable as a cable rather than disappearing beneath a thick arrow. Look at the complete frame as well as the immediate target, because a clear detail can still distract from the overall relationship.
Download PNG when you want the fresh flattened annotation image with source transparency retained except where marks paint pixels. JPEG is a lossy alternative using quality 0.94 and white behind transparent areas. The two formats can therefore look different around fine lines and transparent edges. Neither output contains separate editable annotation layers, and the editor does not force a promotional logo onto the image. Open the actual downloaded file outside the workspace, using the viewing size intended for its recipient. Check number readability, line contrast, object visibility, and whether every reference still points to the correct thing.
A later resize can make a previously readable number too small. If you use the Image Resizer for a separate size adjustment, inspect its result again instead of treating the first export as final approval. The same applies to later compression or messaging software that changes the display. Save a newly approved file after changing any mark, because an older download on your device cannot update itself. The editor invalidates prepared outputs when the draft changes, but it cannot remove outdated copies from a shared folder. Make the approved version unmistakable in your own handoff process.
Choose the right record for editing or review
Save settings produces a small JSON file containing the image dimensions, platform context, and mark settings, without the image or original filename. It is not a complete visual project or an archive of the source photograph. To reopen it, select the intended source first and then use Open settings with matching prepared dimensions. Equal dimensions do not prove that two photographs are the same. Harbor Shelf stores the original kit photograph separately and checks the actual accessories before reopening the settings. Applying an old box to a different table photograph could be technically aligned while making an entirely wrong claim.
The PDF is a review record containing the flattened annotated proof and a full readable mark inventory. Its attachments are image-free settings and review JSON, not the original photograph or an editable source-image layer. The visible proof can still reveal everything left in the annotated picture, and the inventory can reveal your mark names. Treat the report according to that content. A reduced proof is not the best place to inspect tiny artwork detail, so keep the actual PNG or JPEG alongside it when the reviewer needs to judge readability. Rasterized report text has selection, search, and accessibility limitations; use the complete text alternatives too.
CSV, TXT, and Copy review provide the complete mark inventory for a separate record or handoff. These outputs describe the annotations but do not contain the image itself. Settings can preserve a blank draft, while image and review outputs need a source with at least one valid mark. If the PDF cannot fit its supported report budget, use the complete alternative records rather than expecting a partial report to stand in for the whole review. Before sharing, read the inventory as carefully as the picture. A private internal label is still information even when the artwork contains only an innocent looking number.
Finish with an explanation and a recoverable handoff
Describe the finished annotated image in words that carry its purpose. For Harbor Shelf, the useful explanation is that a box groups the loose accessories, circle 1 identifies the coiled cable, and circle 2 identifies the adapter pouch. Develop that separate description with the Alt Text Writer when a writing workspace would help. This editor does not add a native platform description, read the image, or generate an explanation for you. Include important relationships rather than only naming colors and shapes. The reader should be able to understand what belongs in the kit even when the visual pointers are unavailable or hard to distinguish.
Save the needed files before closing or reloading the page. There is no autosave, cloud project storage, login, or automatic publishing. Ordinary website resources still load, so local image processing is not a promise that the whole site works offline. Returning through browser history may offer Restore image for a retained source file; restoration is explicit, not an automatic rebuild of the picture. After a full reload, select the source again and reopen saved settings. Choosing a replacement image clears marks after confirmation, so save a useful annotation layout before starting a different photograph. An open tab is not a durable archive.
The final handoff should answer three ordinary questions: which picture is approved, what do its references mean, and which files are needed to revise it later? Give the next volunteer the annotated kit image and its two item explanation. Keep the source and settings with the person responsible for edits, and include the review proof only when a review record serves a purpose. Selecting a platform context does not connect an account or check native acceptance. SMTasker handles broader account routines outside this local annotation workflow. Finish here with a small, accurate visual explanation that someone else can actually use.
Make the explanation fit its destination
Platform and practical guides
Different images, reader questions and handoffs, with a complete route between every guide and the editor.
Instagram Image Annotator
Point out a useful detail in one Instagram image without turning the photograph into a crowded instruction sheet.
Read the guideTikTok Image Annotator
Prepare a still explanation for a short-form workflow with a clear visual target.
Read the guideYouTube Image Annotator
Mark the detail that a viewer needs to notice in an explanatory still.
Read the guideFacebook Image Annotator
Give a community update or visual question a useful reference point.
Read the guideLinkedIn Image Annotator
Prepare specific professional feedback that separates observations from suggestions.
Read the guideThreads Image Annotator
Support a visual discussion with one focused annotated image.
Read the guideX Image Annotator
Make a concise visual explanation easier to follow in a fast-moving feed.
Read the guideSnapchat Image Annotator
Use simple marks to support a direct visual explanation.
Read the guideReddit Image Annotator
Show exactly which visible detail a question refers to, while preserving useful context.
Read the guideAnnotate Screenshots
Turn one screenshot into a clear, reviewable explanation without pretending the interface has changed.
Read the guideNumbered Step Images
Use manually numbered circles with a matching explanation and a stable reading order.
Read the guideQuestions about annotating an image
Can I write a caption directly on the image?
No. The artwork supports arrows, outline boxes, outline ellipses, and numbered circles. Only the manual circle number is drawn as text; Mark name is for the review inventory.
Will an outline box hide private information?
No. Boxes and ellipses have no filled interior, and annotations are not redaction. Prepare and inspect a separately covered source before using this tool when private details must be removed.
Do circle numbers change when I reorder marks?
No. Move earlier and Move later change stacking only. Check and edit the manual circle numbers and their accompanying explanation yourself.
Does Save settings contain my photograph?
No. It stores dimensions and mark settings without the image or original filename. Select the intended matching-dimension source before reopening it; dimensions alone do not identify a photo.
What is included in the review PDF?
The annotated proof, full mark inventory, and image-free settings and review JSON attachments. It does not attach the original photo. Its visible content still needs a sharing review.
Keep visual approval with your team
Organize the account work around your content
Use SMTasker for supported account routines beyond this free annotator. Image files are not automatically imported, hosted, or published by the editor.