4- Get your android phone ready
Unlock Developer Options, switch on USB Debugging, and approve the handshake — a one-time, five-minute phone setup.
Your phone and your computer need to speak the same language. To do this, we need to unlock a “hidden” menu on your phone called Developer Options.
Prefer to watch? This step is also covered on our YouTube channel — the written guide below matches it exactly.
Step 1: Unlock Developer Options
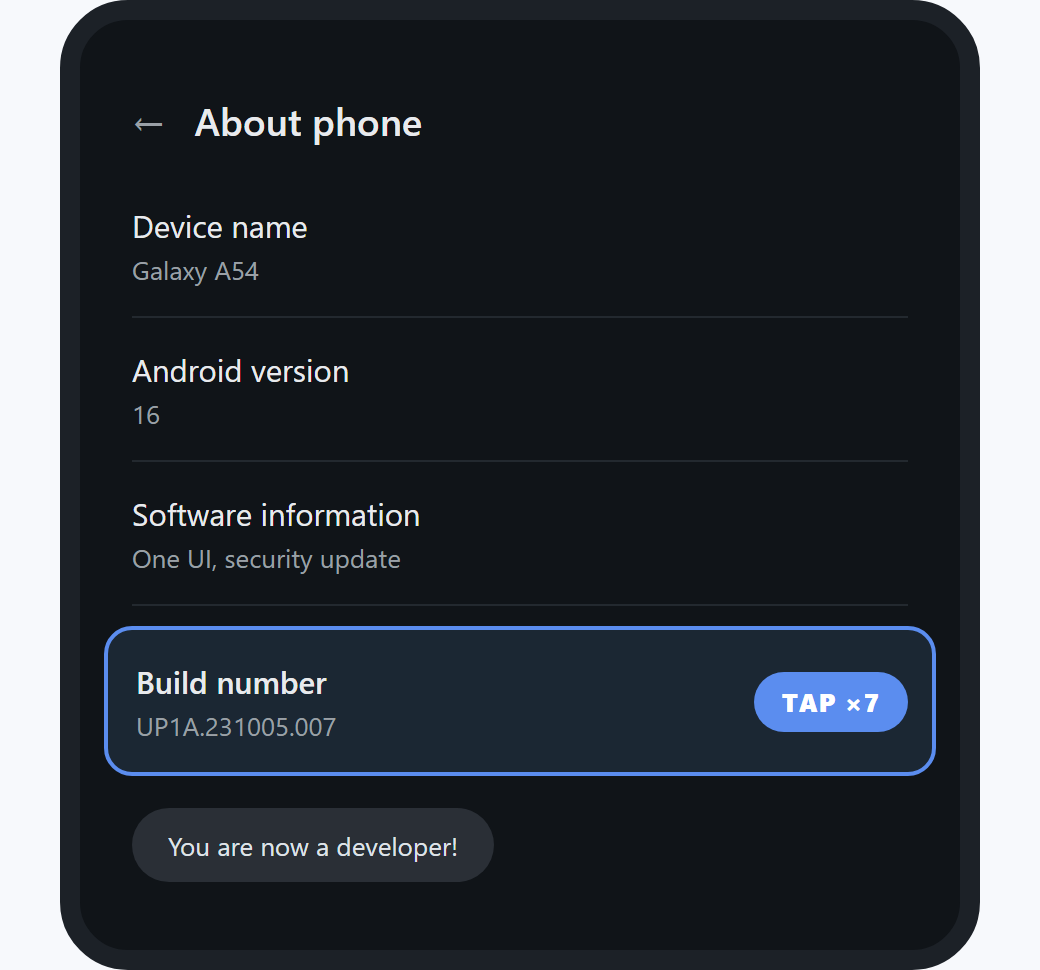
The secret handshake: Settings → About phone → Build number, tapped seven times, until the “You are now a developer!” toast appears.
Think of this like finding a secret door in your phone’s settings.
- Open Settings (the gear icon) on your phone.
- Scroll to the very bottom and tap About Phone.
- Look for Build Number. (If you don’t see it, tap “Software Information” first).
- Tap Build Number 7 times quickly. Enter your PIN if prompted.
You will see a small message that says: “You are now a developer!” or “Developer mode has been turned ON”. - Go back to your main Settings screen. You will now see a new menu at the bottom called Developer Options. If you are on Huawei, this option is in “System & updates”.
Step 2: Turn on USB Debugging
Now that the secret door is open, we need to flip the switch that lets SMTasker control the phone.
- Tap Developer Options.
- Scroll down until you find the switch labeled USB Debugging and turn it ON.
- A popup will appear asking “Allow USB debugging?”. Tap OK.
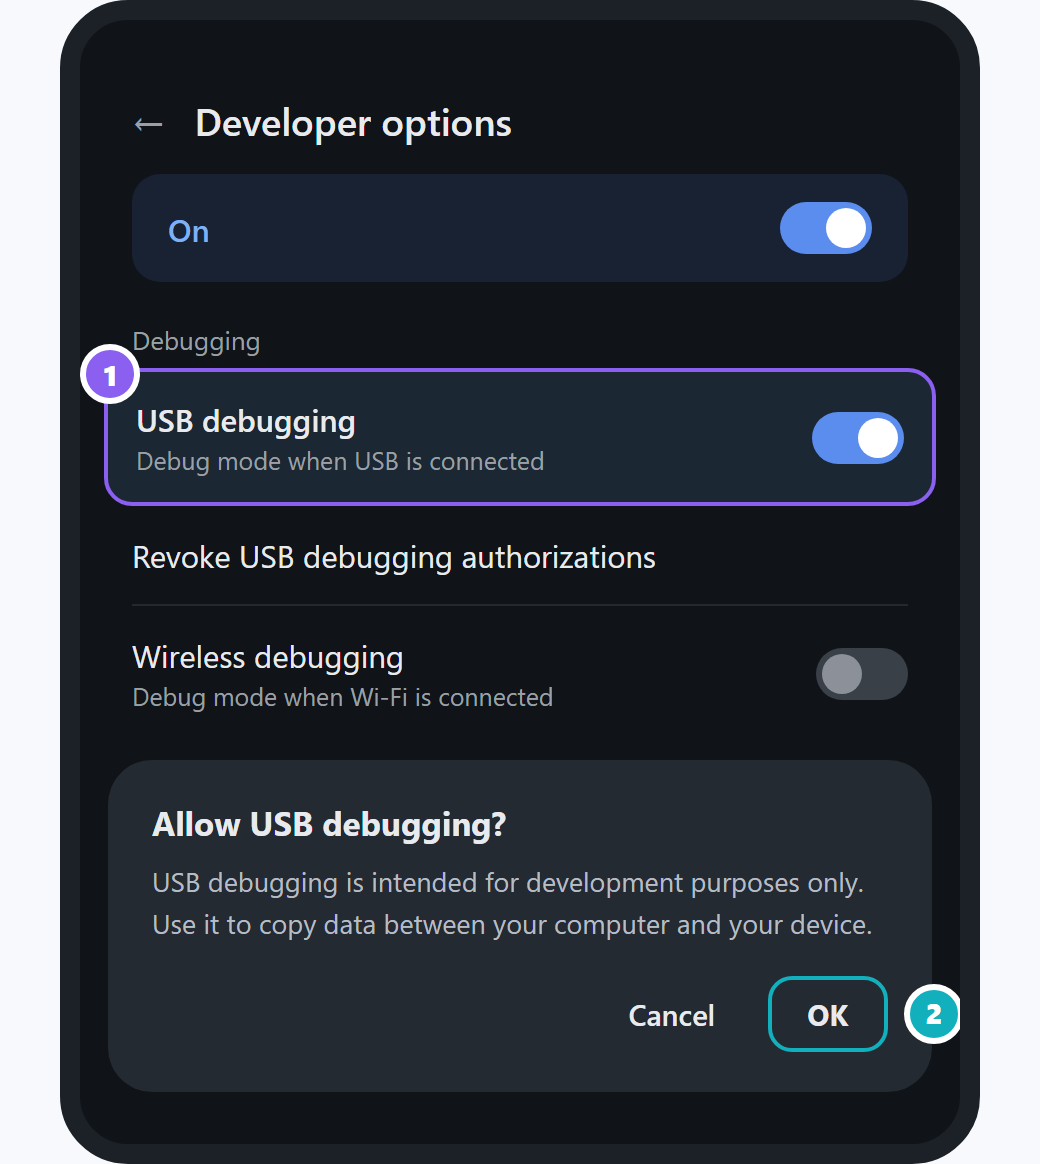
Flip USB Debugging on (1), then confirm the popup with OK (2) — that is the whole switch.
Step 3: The “Final Handshake”
Plug your phone into your computer using a USB cable. Watch your phone screen! A message will pop up asking: “Allow USB debugging from this computer?”
- Check the box that says “Always allow from this computer.”
- Tap Allow.
The whole preparation in one picture: unlock Developer Options, switch on USB Debugging, then approve the handshake.
Special note for Samsung users (Auto Blocker)
If your “USB Debugging” switch is grayed out and you can’t click it, Samsung is protecting the phone.
- Go to Settings > Security and Privacy.
- Find Auto Blocker.
- Turn it OFF (you may need to enter your PIN).
- Now, go back to Developer Options, and you will be able to turn on USB Debugging.
Troubleshooting: phone not showing up?
If you’ve done the steps above and the phone still doesn’t appear in your dashboard:
- Check the Cable: Some cables only “charge” and don’t “send data.” Try the cable that came with the phone.
- Change the Mode: Swipe down from the top of your phone. Tap “USB Charging” and change it to File Transfer or MTP.
- The “Fresh Start”: Unplug the phone, go to Developer Options, tap Revoke USB debugging authorizations, and plug it back in.
If you are unable to connect your phone, get in touch with our customer support team and we will help you out.
Phone ready! What’s next?
Everything is now configured on the hardware side. The final step is to physically connect your device to your computer and verify that it appears live on your SMTasker dashboard.