Getting Started With SMTasker: The Complete Roadmap
5 min read8 stepsBeginnerUpdated Jul 16, 2026
Welcome to SMTasker! You are just a few steps away from turning your Android phone into a powerful, 24/7 social media manager. Whether you want to auto-post content, grow your followers, or automate your engagement (Likes, DMs, and more), this guide shows you the right way to set everything up.
Your Automation Journey
Follow these 8 steps to move from a fresh account to a fully automated growth machine.
1
Foundation
2
Device Setup
3
Launch
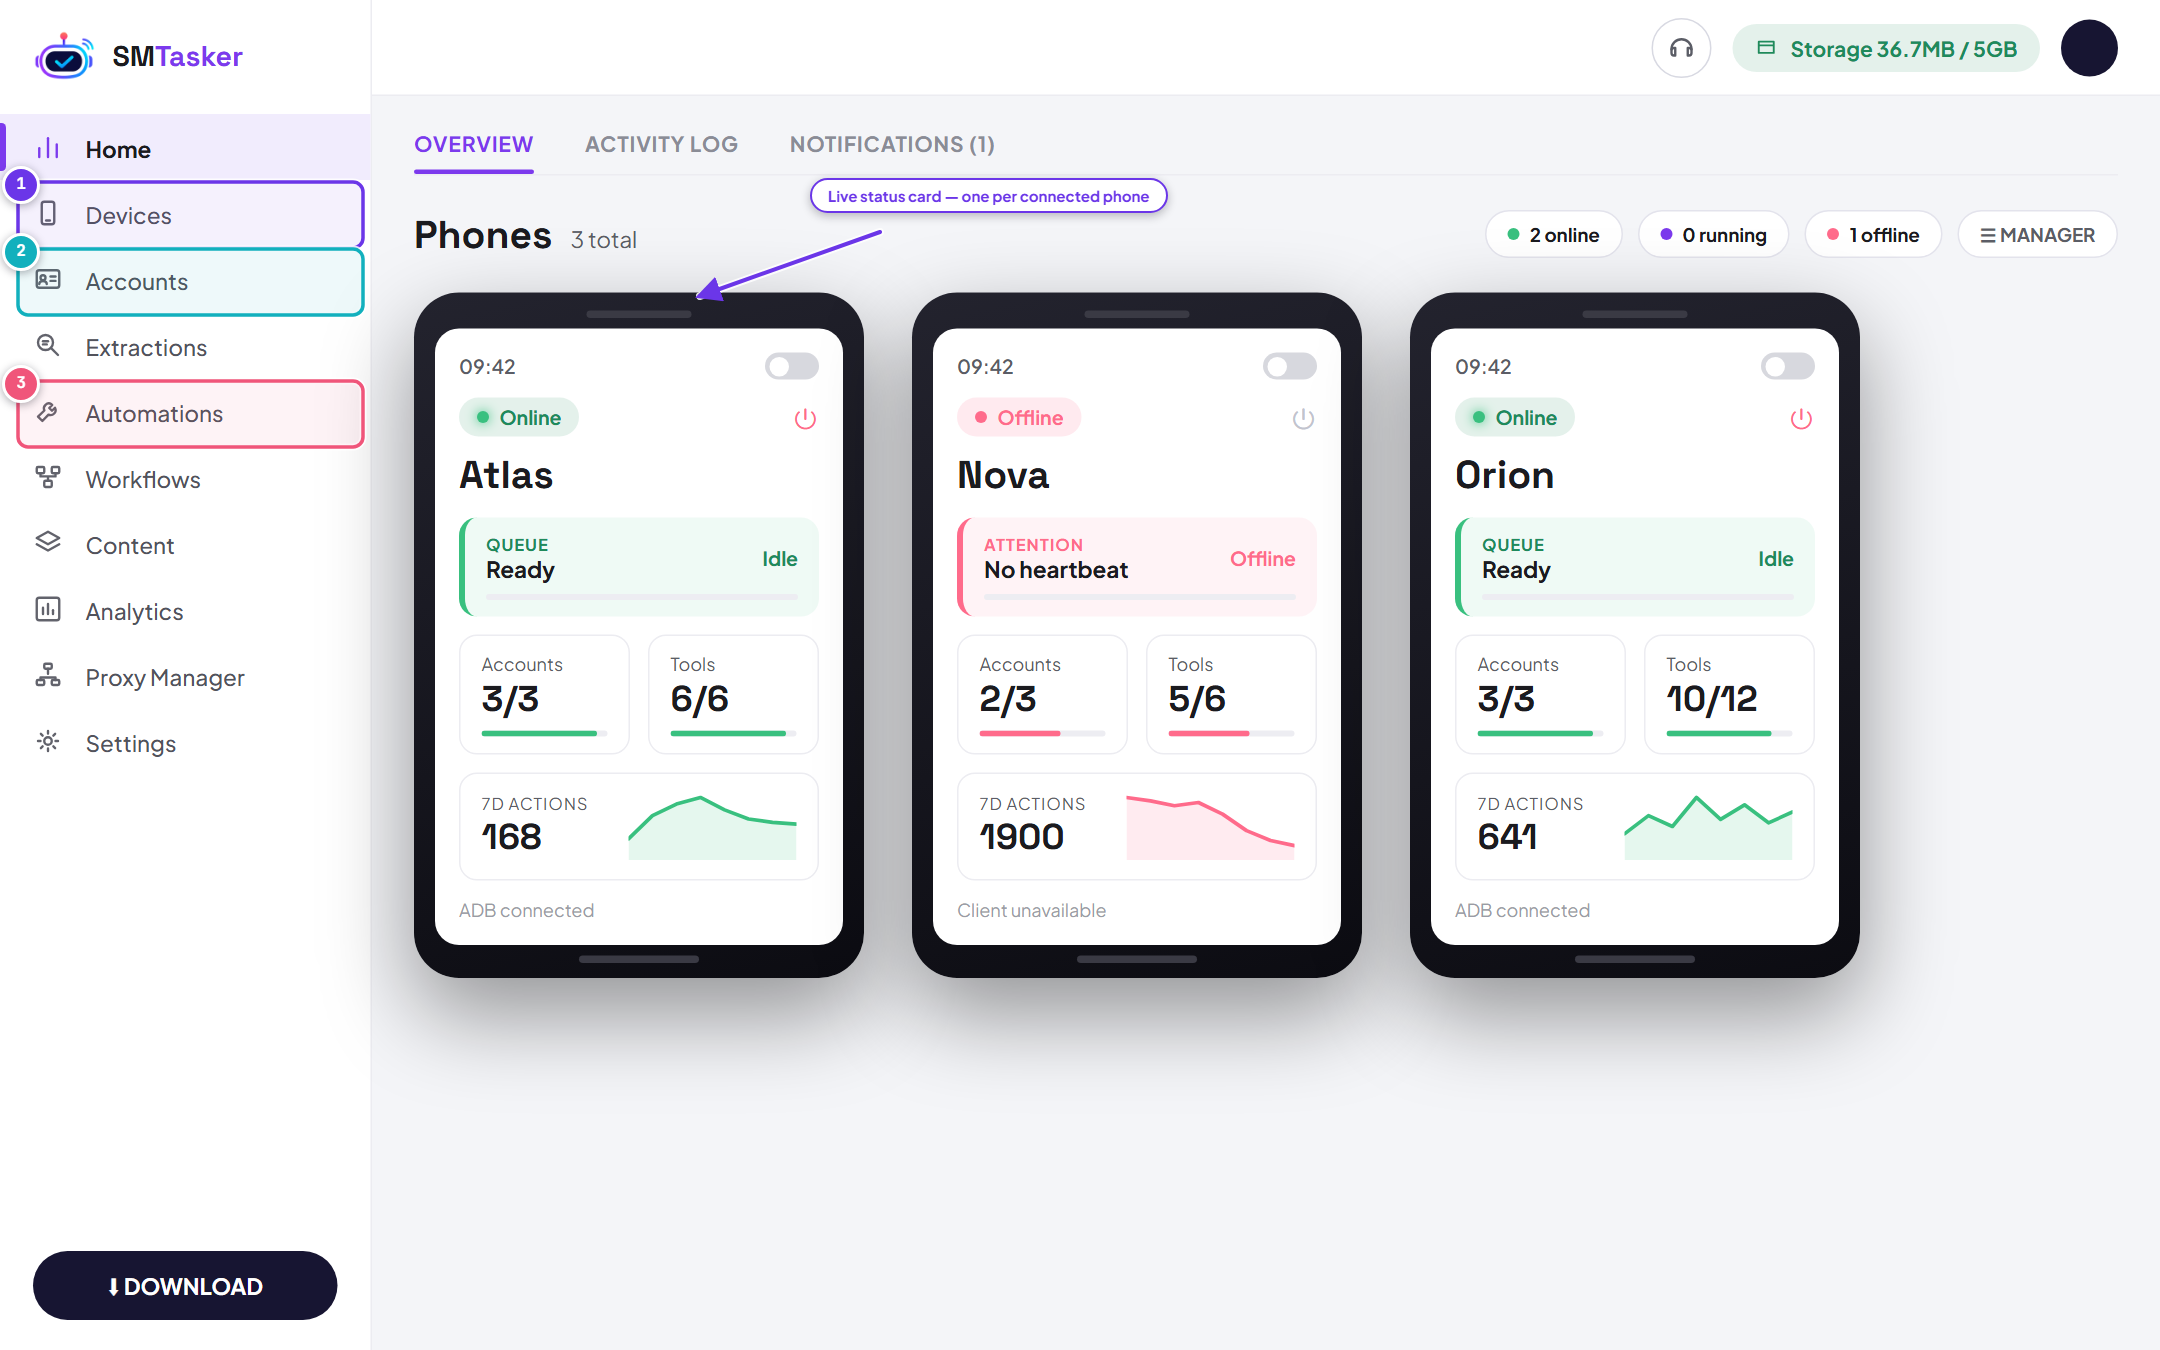
Before you dive in, here is the dashboard you are working toward. The numbered items map to the phases below: 1 — Devices (connect your phone), 2 — Accounts (add your social accounts), and 3 — Automations (pick a tool and press Start).
1
PHASE 1
The Core Foundation
1How SMTasker Works (in 60 seconds)Understand the “Phone-to-Cloud” architecture that lets you run safe, professional-grade automation through a physical device.2Create your SMTasker accountThe first step to accessing your cloud dashboard and managing your automation tools.3Download & install the local clientInstall the lightweight bridge software that connects your computer and phones to our secure servers.
2
PHASE 2
Device & Hardware Setup
4Get your Android phone readyPrepare your hardware by enabling Developer Options — this is what lets the software perform human-like actions on your behalf.5Plug in your phone & confirm connectionThe moment of truth! Connect your phone via USB and verify it is visible and ready for commands in the dashboard.
Tip: “Developer Options” sounds technical, but it’s a one-time setup — the guide walks you through every tap, and you never need to touch it again.
3
PHASE 3
Launching Your Automation
ONGOING
Ongoing Support
Ready to scale your social media?
Start at the beginning and you’ll be fully automated in under an hour.
Begin with Step 1: How SMTasker WorksPREVIOUS
You're at the start
NEXT
How SMTasker Works (in 60 seconds)