7- Run your first phone automated posting campaign
Set up your first automated posting campaign — upload media, schedule it, and let your content publish itself.
So you’ve set up your phone, connected it to SMTasker, and even got your first automated actions running – nice work! Now it’s time to take things up a notch: publishing content automatically to your social media account.
In this guide, we’ll walk you through the full process – from uploading your content to launching your first automated posting campaign. Let’s get into it!
Prefer to watch? This step is also covered on our YouTube channel — the written guide below matches it exactly.
Before You Start
Make sure you’ve already completed the previous steps:
- Your phone is connected and showing on the dashboard.
- You’ve added the Publish tool to your account (if not, go to Automations → ADD AUTOMATIONS and check Publish).
If you don’t know how to add automations to your account, follow this guide first: Run Your First Phone Automated Actions.
Step 1: Upload Your Content
Before SMTasker can post anything, it needs content to work with – your images or videos, plus captions. This is all managed in the Content section.
In your SMTasker dashboard, click Content in the left sidebar. Then click the MEDIA FOLDERS tab at the top.
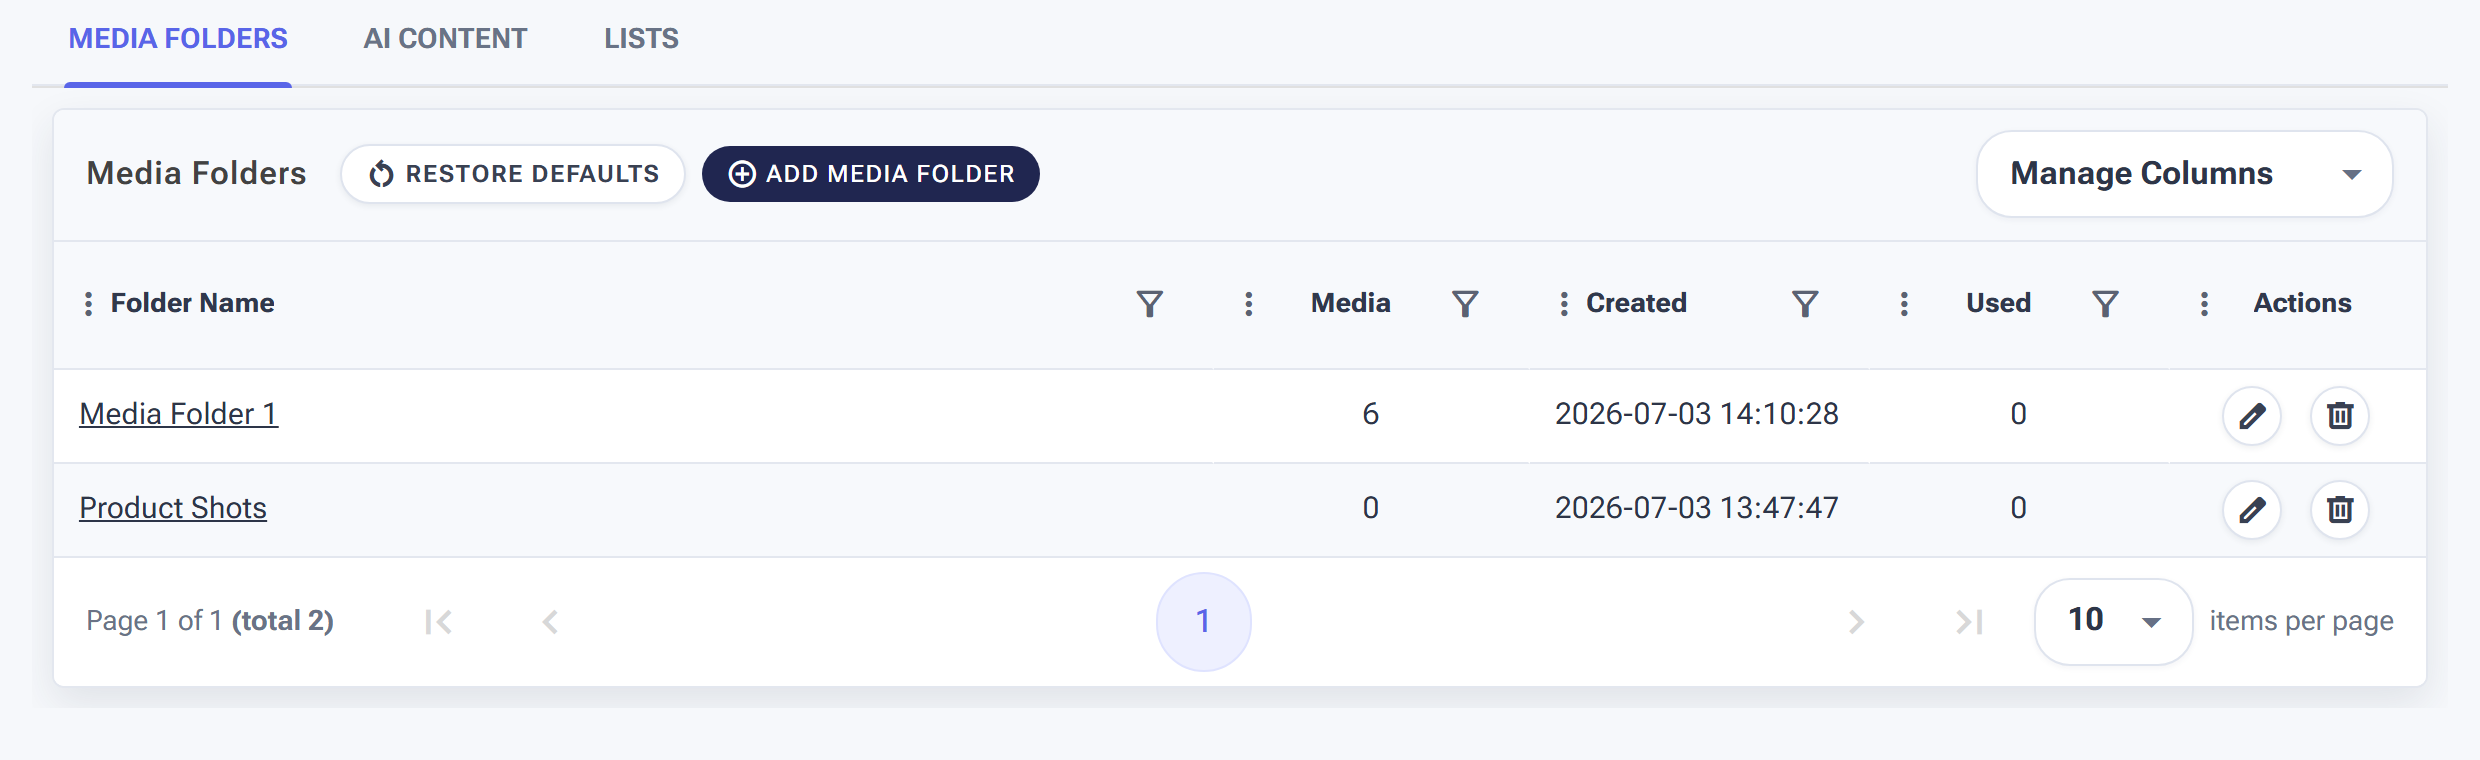
Content → Media Folders is where all your content lives before it gets posted.
Create a Media Folder
Click the ADD MEDIA FOLDER button. You’ll see a form with a few fields:
- Folder Name: Give your folder a clear name that describes the content inside (e.g., “Nature Posts”).
- Auto delete media after x usages: Set the number to 1 if you only want each image posted once.
- Auto delete media after x unused days: The default is 30 days.
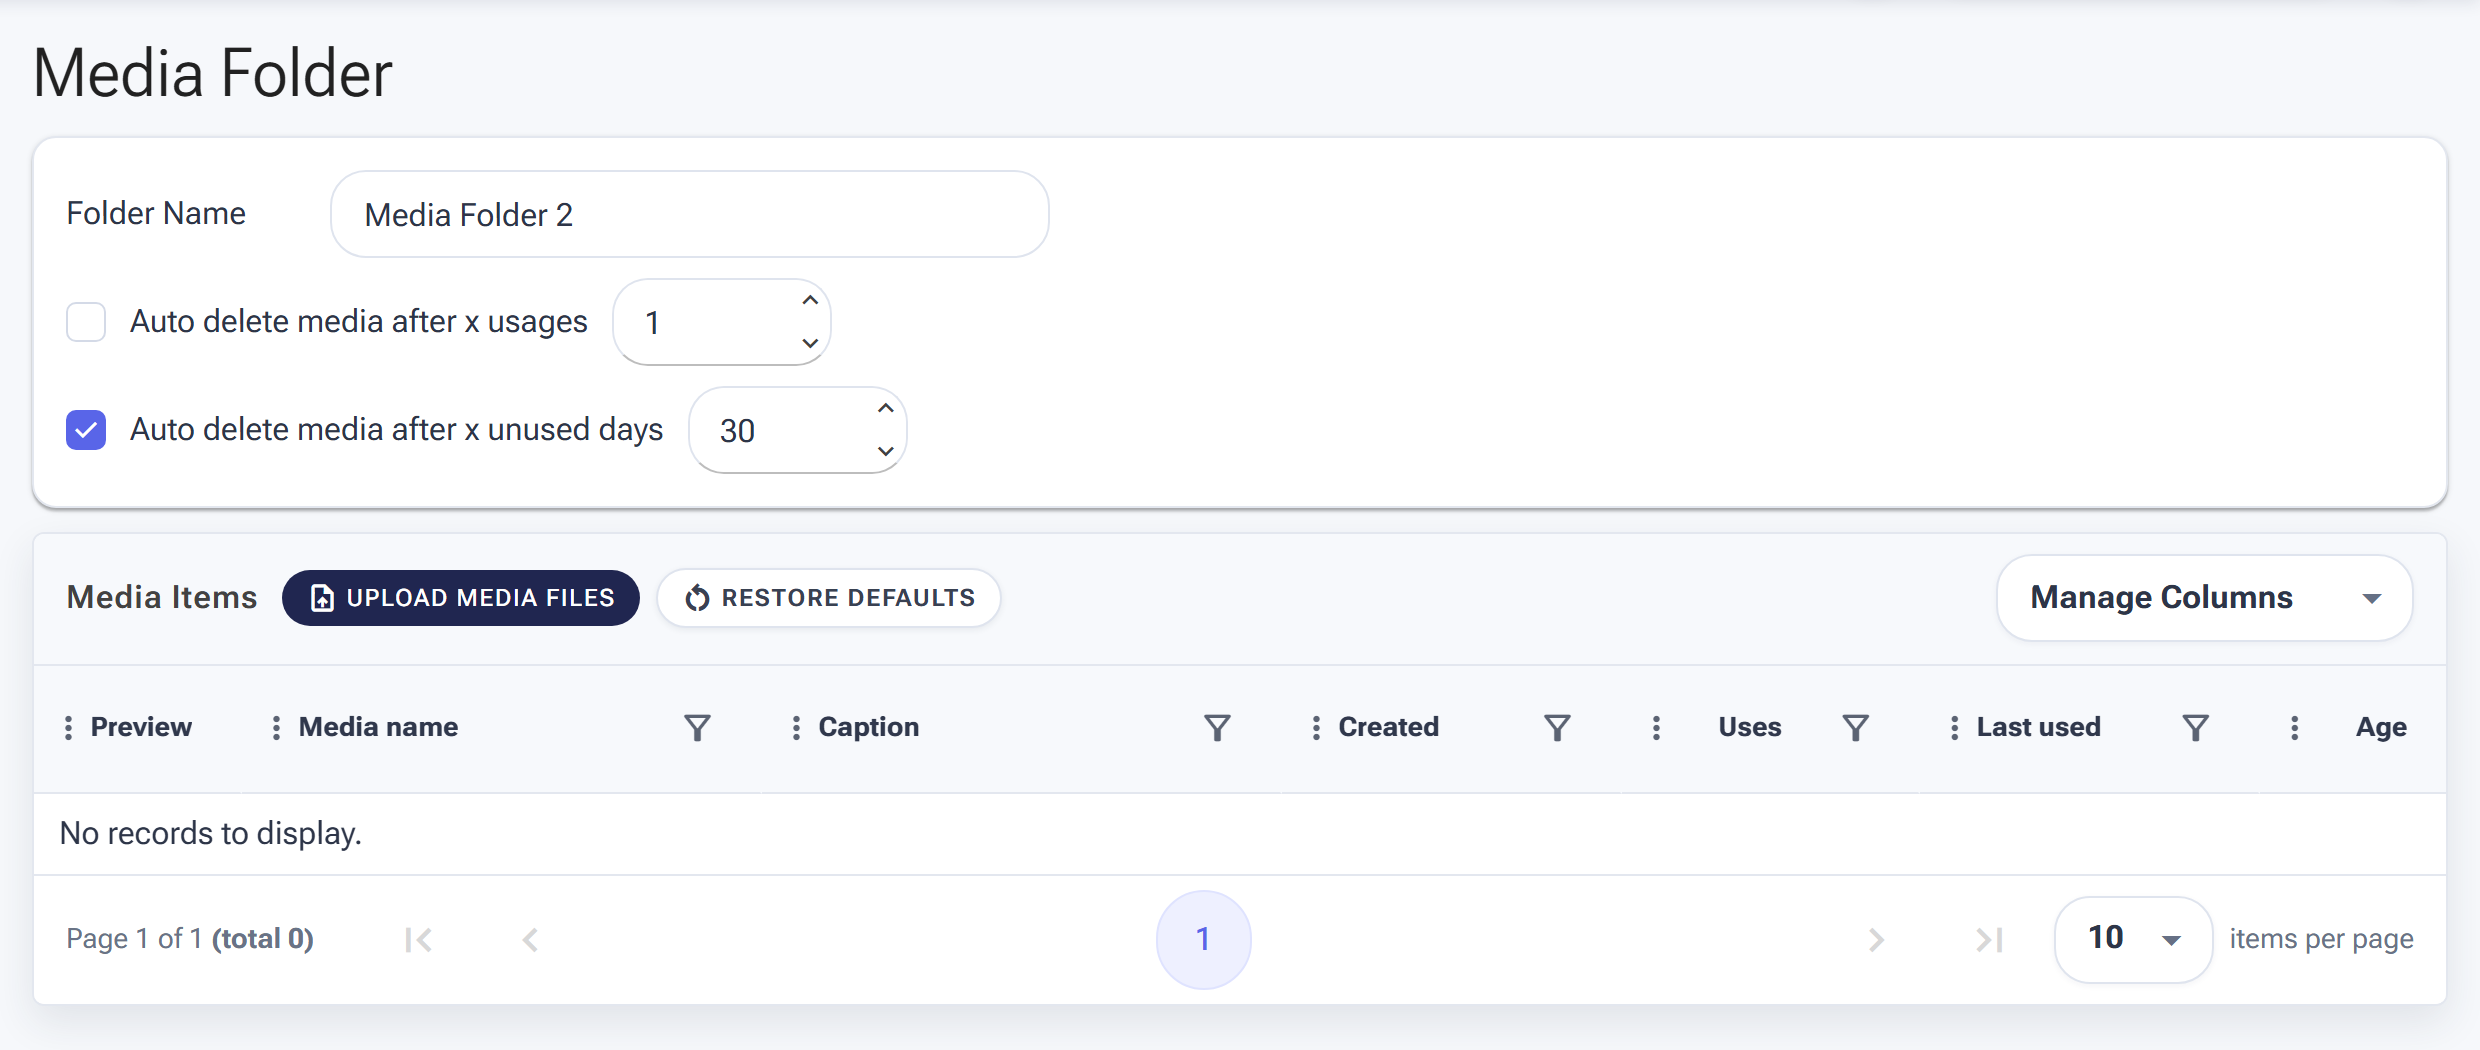
Name the folder first — the upload button unlocks once a title is set.
Upload Your Media Files
Now click the UPLOAD MEDIA FILES button to add your images or videos (The button won’t be clickable unless you set a title first). Once uploaded, your files will appear in the Media Items list with a Caption field next to each item.
Add Captions
This is important – each media item has its own Caption field right next to it. Type your caption directly into the box.
{Hello|Hey|Hi} everyone!. This creates variations so your posts look more natural.
Quick Tip 2: You’ll also notice an AI button next to each caption field. Click it to add an AI prompt and then use it with your post caption if you want.
Step 2: Open the Publish Automation Settings
Now head over to the Automations page. Find Publish in your tools list and click on it. You’ll land on the SETTINGS tab.
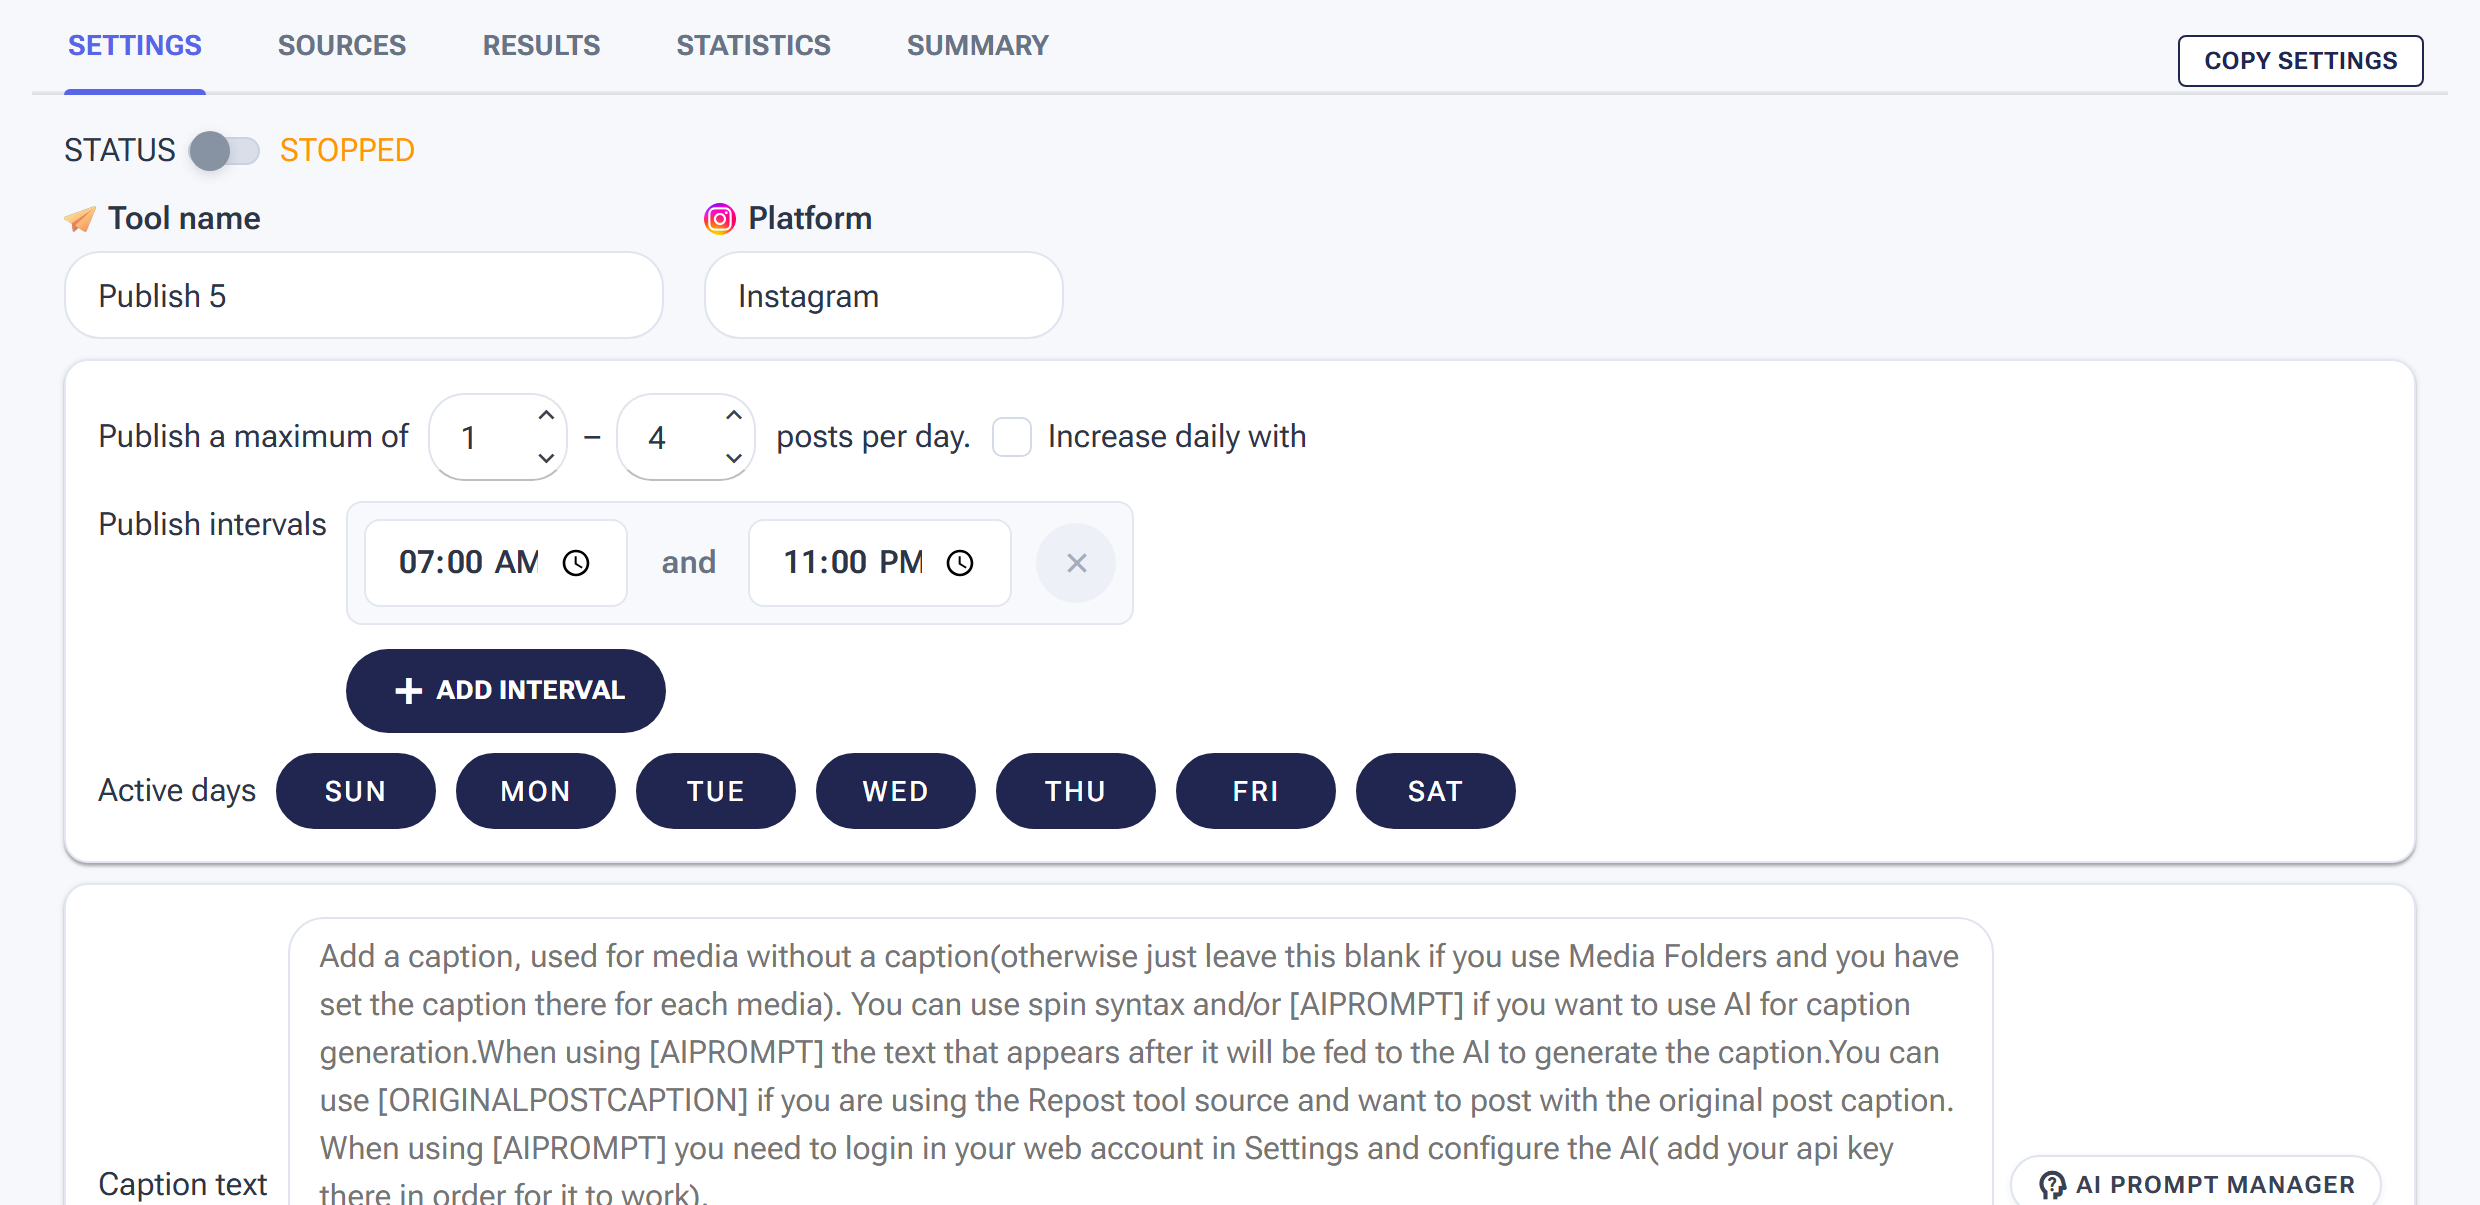
The Publish settings: status, posts per day, time window, and caption options.
1- Status Toggle
At the top, you’ll see a STATUS toggle. Leave it off for now while we finish setting things up.
2- Posts Per Day
Set a minimum and maximum (e.g., 1 to 3 posts per day). SMTasker will randomly pick a number within that range each day to keep things looking natural.
Important: Don’t go overboard. Start with 1–3 posts per day and adjust later once things are running smoothly.
3- Publish Intervals & Active Days
Set the time window (e.g., 07:00 to 23:00) and pick which days of the week the Publish tool should run. All days are selected by default.
4- Caption Text & Post Options
This section allows you to customize what text appears with your posts and where they are published. Here is a breakdown of what you can do here:
- Fallback Caption: If you haven’t set a specific caption for an image in your Media Folder, SMTasker will use the text you type here instead.
- Advanced Tags: You can use special automation tags like:
[AIPROMPT]: Follow this with a prompt to have AI generate a caption on the fly.[ORIGINALPOSTCAPTION]: Great for reposting; it pulls the text from the source post automatically.
- Location Name: Type a city or place here to “check-in” and add a location tag to your post.
- Post Type: Choose between Post on wall (your main feed) or Post in story.
Step 3: Set Your Content Source
Now click the SOURCES tab at the top of the Publish tool page.
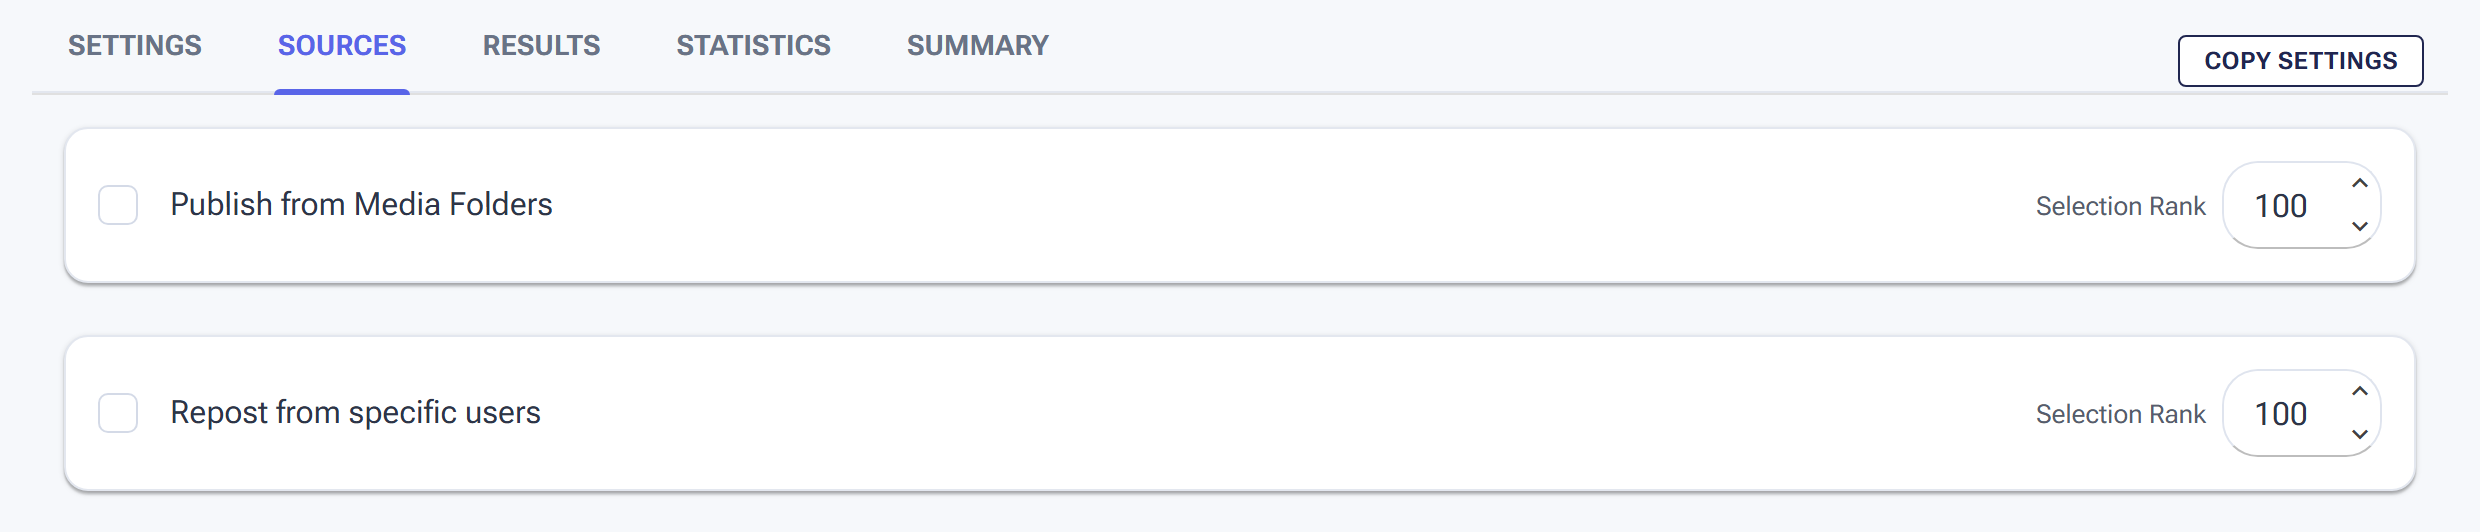
Sources tab: enable Publish from Media Folders and pick your folder.
Publish from Media Folders
Check the box next to Publish from Media Folders. Select the folder you created in Step 1 from the dropdown. Make sure the IsActive box is checked in the table.
Step 4: Turn It On!
Go back to the SETTINGS tab and flip the STATUS toggle to ON. You’ll see it change to STARTED in green.

Flip Status to ON — the green STARTED label means your campaign is live.
Step 5: Monitor Your Posts
Head back to the Dashboard to see activity in real time. Check the LOG tab for detailed messages or the RESULTS or Summary tab on the Publish tool itself for a history of published posts.
Quick Recap
- Go to Content → Media Folders → Create folder and upload media.
- Add Captions (Manual, Spin Syntax, or AI).
- Go to Automations → Publish → Configure schedule and limits.
- In Sources, select your Media Folder.
- Flip the Status toggle to ON.
What’s Next?
With your automated actions and posting campaigns now running smoothly, you’ve successfully set up the core of your mobile automation. To ensure you have everything you need for long-term success, the final step is knowing where to turn if you have questions or need technical assistance.