5- Plug in your phone and confirm connection
Plug your phone in over USB and confirm it shows up Online in your dashboard — the moment everything comes together.
This guide will help you connect your phone to SMTasker and confirm it’s ready to use.
Prefer to watch? This step is also covered on our YouTube channel — the written guide below matches it exactly.
Before you start: your phone must already be configured to accept ADB connections. If you haven’t done that yet, follow this guide first:
Get your Android phone ready
Step 1: Open your dashboard
Log into your SMTasker dashboard. The Phones overview is right on the Home page — you can also manage devices anytime under Devices in the left sidebar.
Step 2: Connect your phone
- Plug your Android phone into your computer using a USB cable
- Wait a few seconds
- The page refreshes automatically every 20–30 seconds
If your phone does not appear after that, refresh the page manually.
Step 3: Confirm the connection
Your phone will appear as a card in the Phones overview, like this:
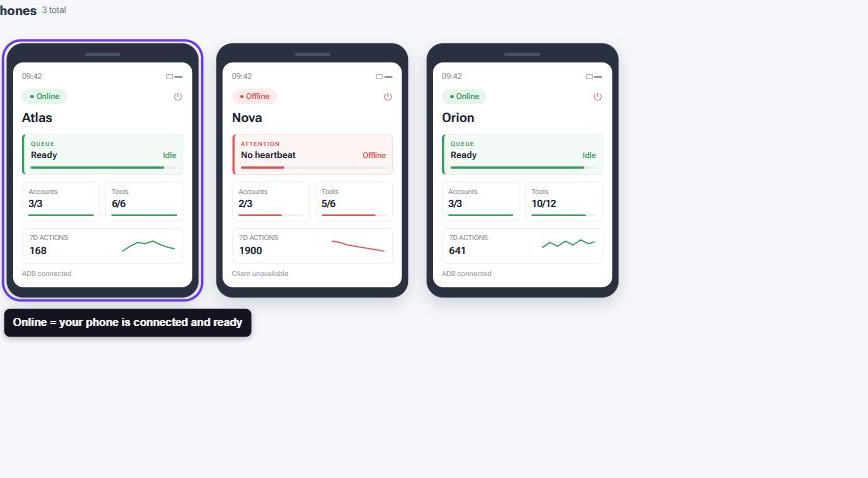
A green Online badge with “ADB connected” at the bottom means the handshake worked. An Offline card with “No heartbeat” means the phone is not reachable — reconnect the cable or check the previous guide.
If your phone appears in the list with an Online badge, it is successfully connected.
What’s next?
Now that your phone is connected: