Adding Social Accounts
A three-step wizard to add your social profiles — enter credentials, assign them to devices, and review before creating.
Before you can automate anything, your social accounts need to live in SMTasker. The Add Accounts button (on the Accounts and Devices pages) opens a three-step wizard: Credentials → Assign Accounts → Review & Finish.
Step 1: Credentials
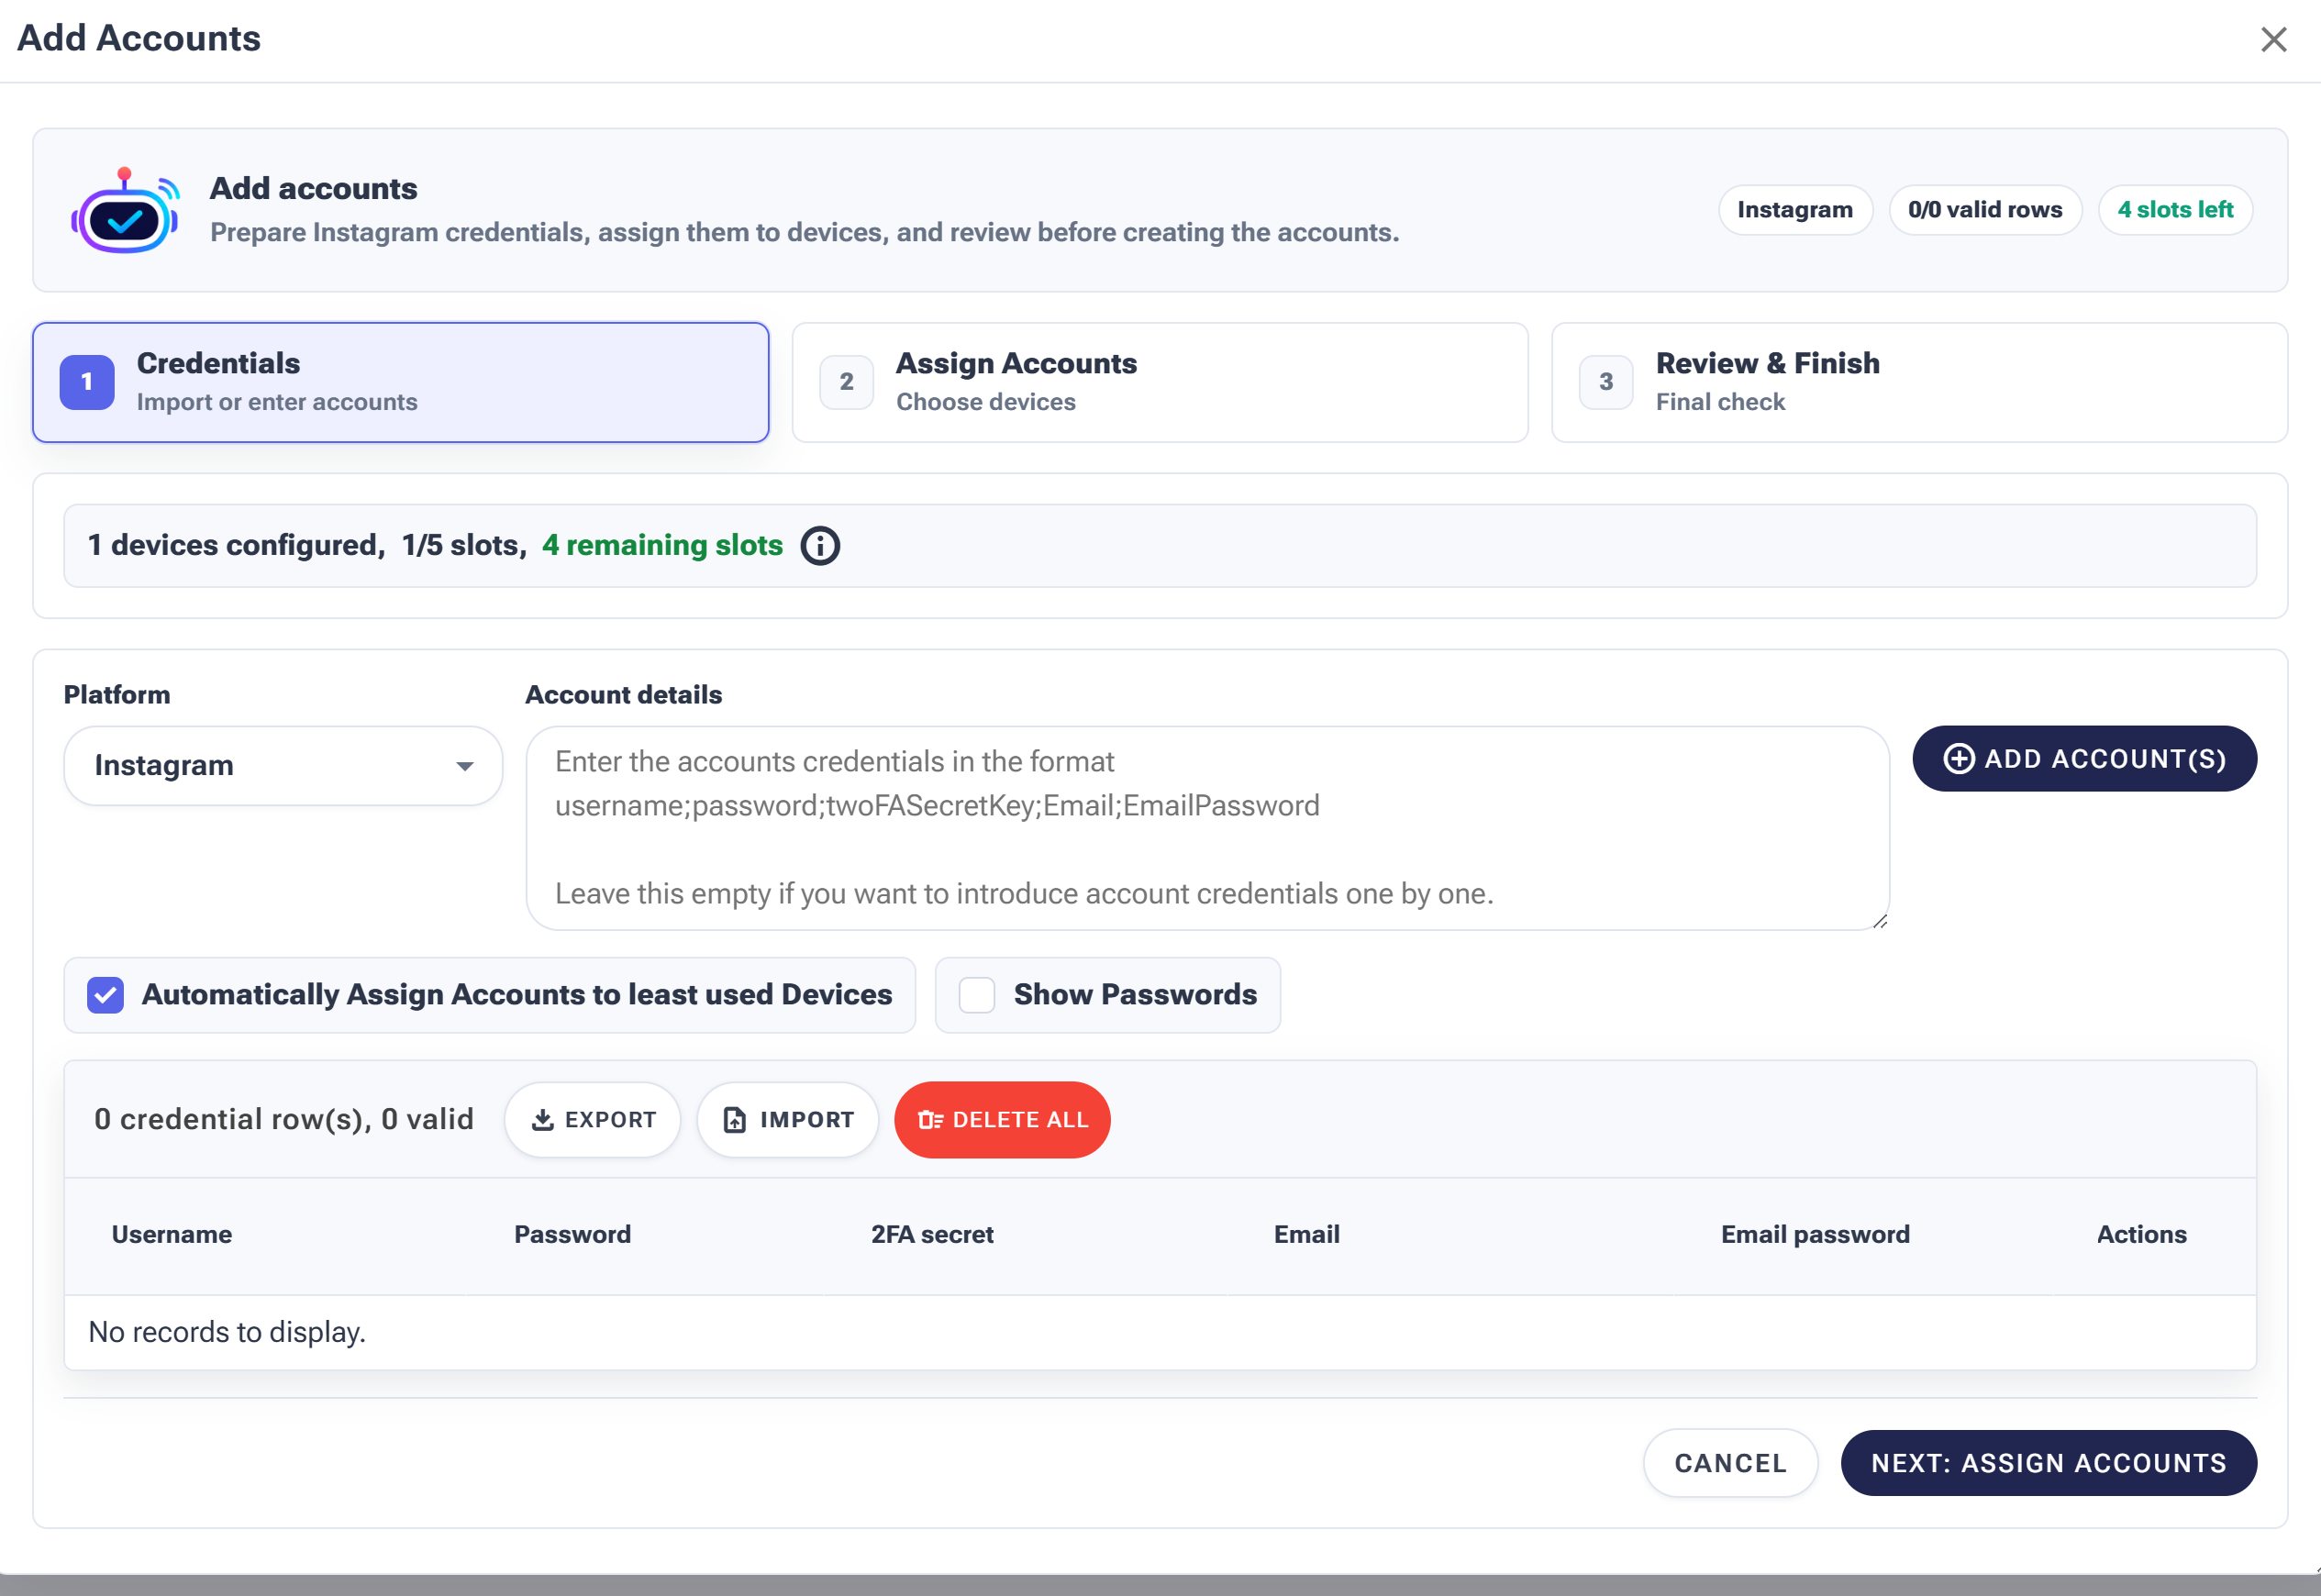
Enter one account per line, or add them one at a time. The slots counter shows how many accounts your plan and devices allow.
Choose the Platform, then add accounts one of two ways:
- In bulk — paste one account per line in the format
username;password;twoFASecretKey;Email;EmailPassword, then click Add account(s). - One at a time — leave the box empty and enter each account’s fields individually.
Handy options here: Automatically assign accounts to least-used devices spreads them evenly across your phones, Show Passwords reveals what you typed, and Import / Export move credential lists in and out. The slots counter shows how many accounts your plan and connected devices allow.
Step 2: Assign Accounts
Every account has to live on a physical phone — that’s the whole device-based model. This step is where you choose which one. Two ways to play it:
- Automatic (the checkbox from step 1) — SMTasker spreads new accounts across your least-loaded devices. Best default for most people.
- Manual — pick a device per account. Do this when it matters which phone an account lives on: for instance keeping one client’s accounts together, or keeping a fragile aged account on a phone with nothing else on it.
Step 3: Review & Finish
The last screen is a plain summary — every account, its device, its platform. Thirty seconds here saves real pain later: a typo’d password or an account on the wrong device is trivial to fix now and annoying to untangle after automations have started. Click Create and the accounts appear on the Accounts page.
After the wizard: the first login
Creating the account in SMTasker doesn’t log it in yet — the first login happens on the phone when automations first need it. To keep that moment smooth:
- Make sure the account’s credentials are current (change the password before adding it, not after).
- Add the 2FA secret key so logins don’t stall on a verification prompt.
- Give new accounts a proper warm-up before attaching aggressive tools — a fresh login followed by instant automation is the classic new-account mistake.