Creating Automations: The Add Automations Wizard
Add new tools to your accounts in one dialog — pick a platform and accounts, then choose from the ten automations grouped by what they do.
Every automation starts the same way: you open the Add Automations dialog, choose which accounts it’s for, and pick the tools you want. You’ll find the Add Automations button on the Automations dashboard and on the Accounts page.
The dialog
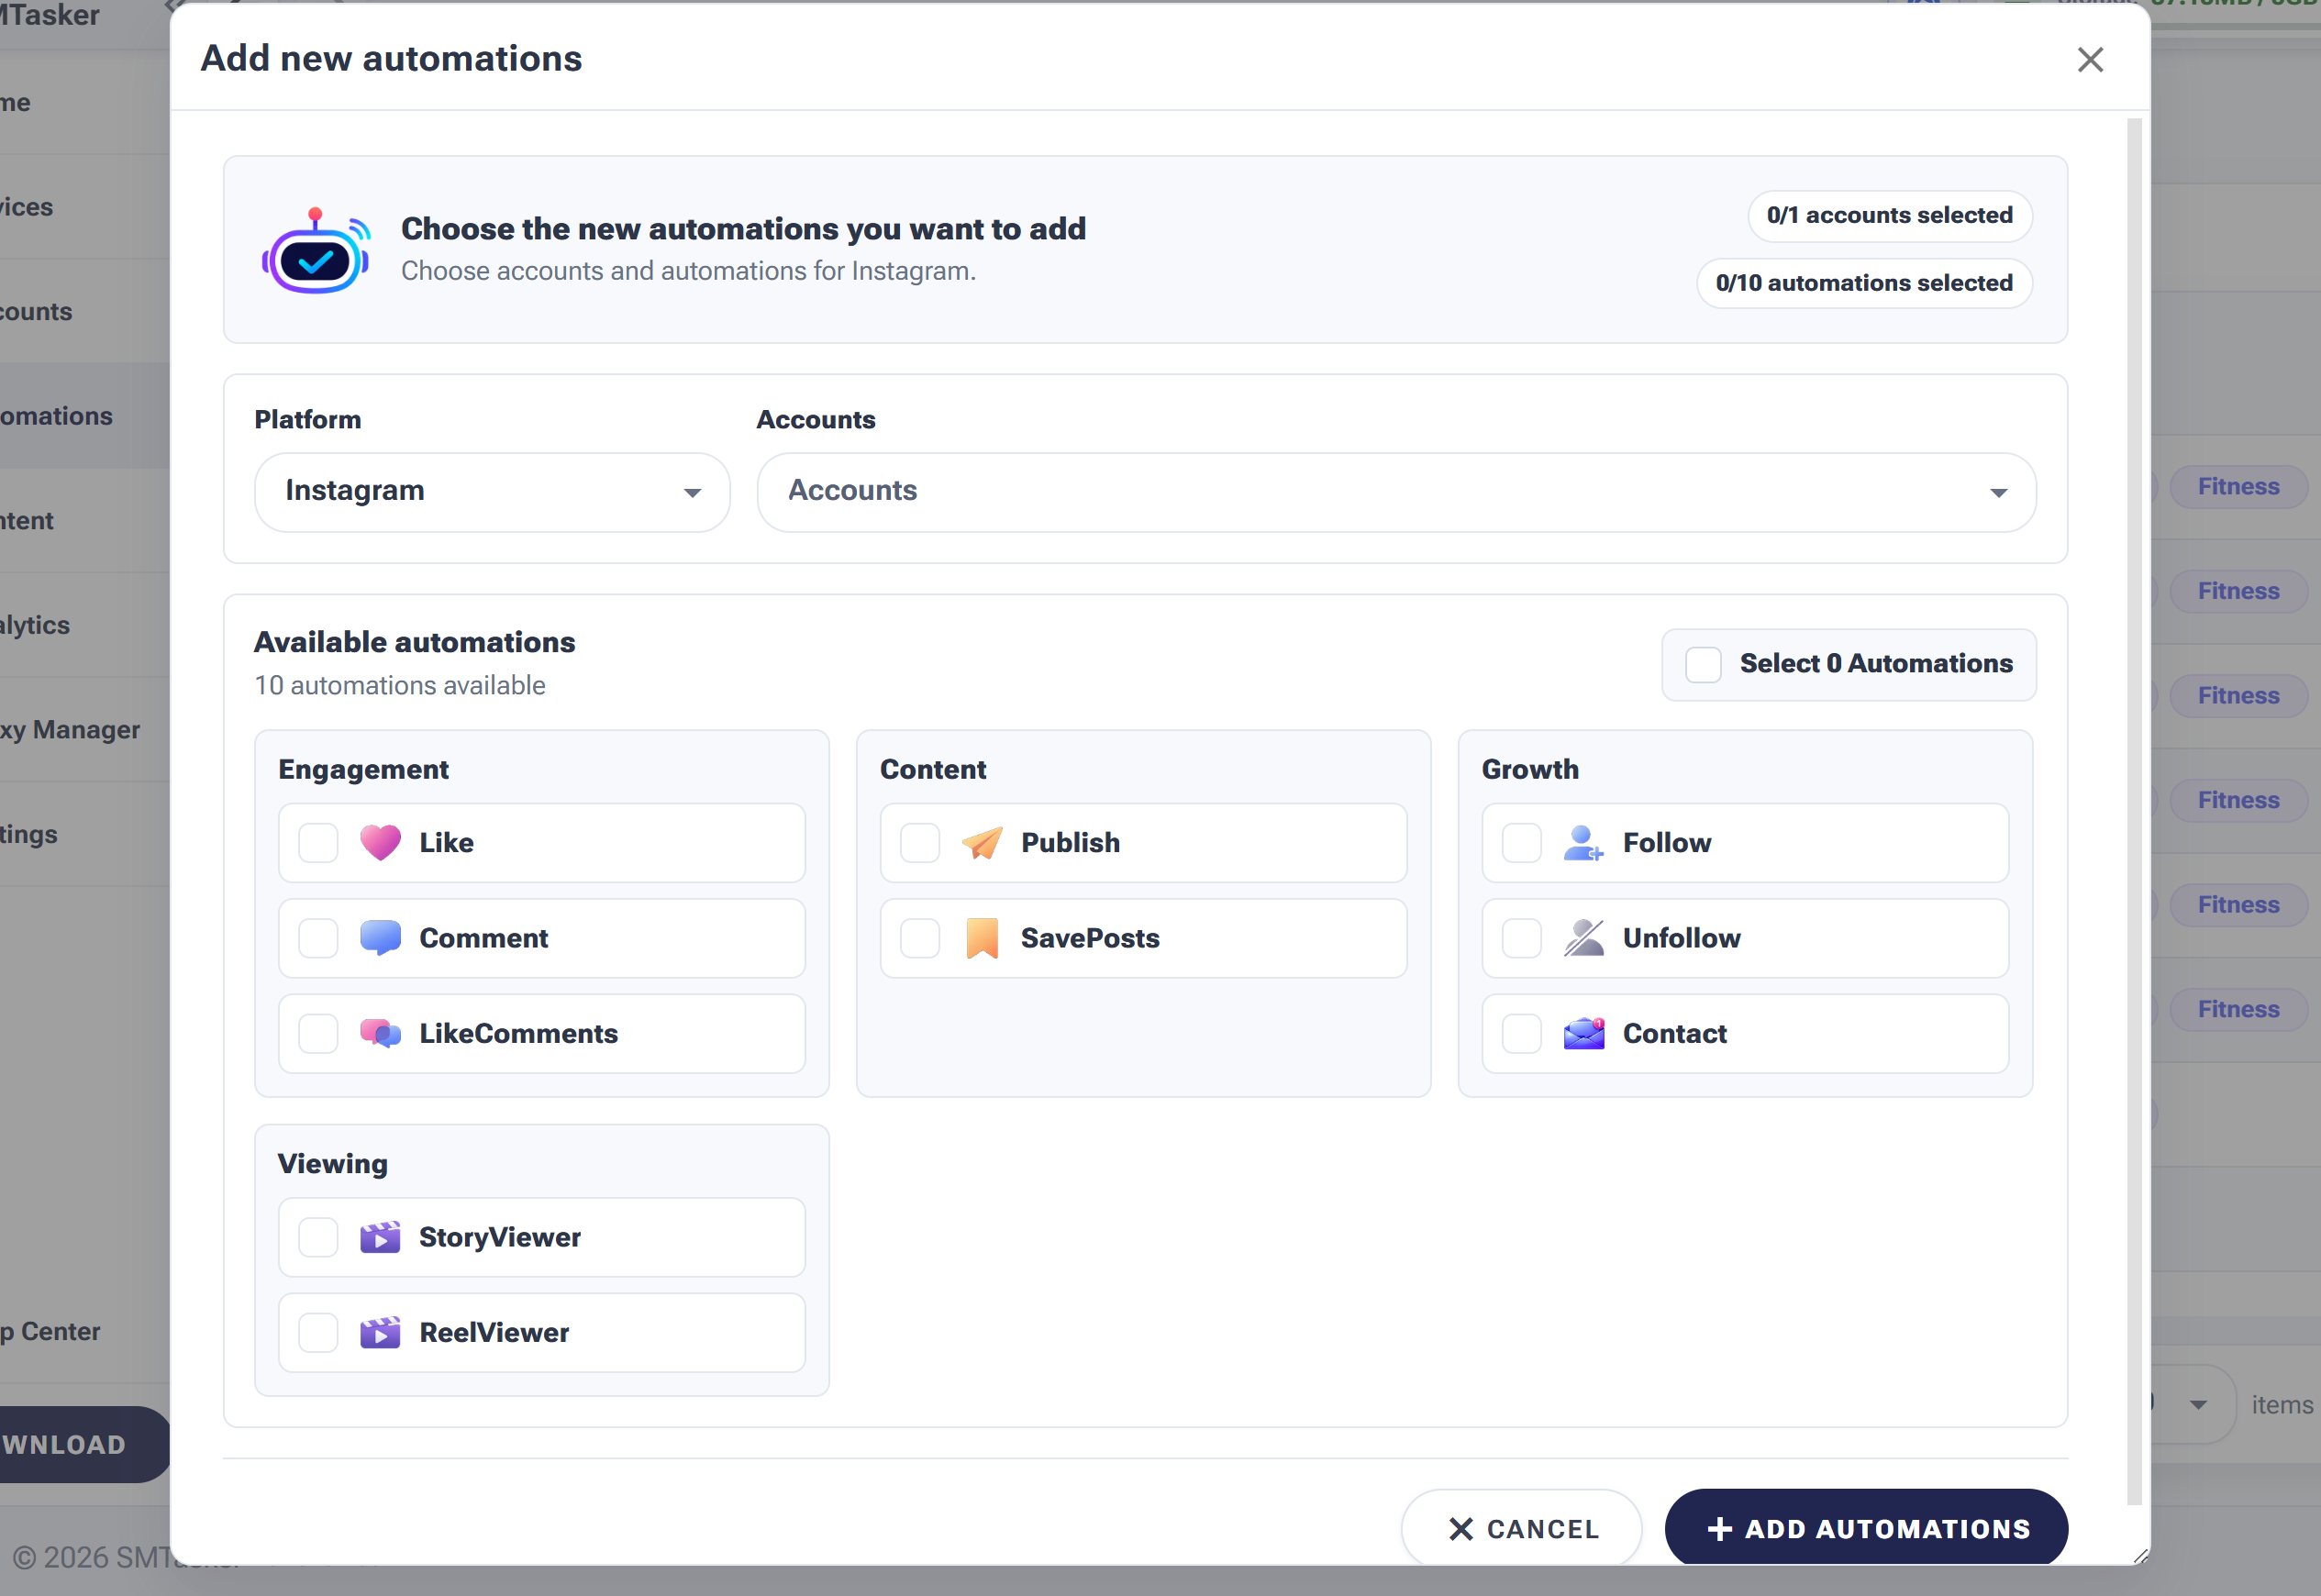
Pick the platform and accounts at the top, then tick the tools you want to add. The counters show how many accounts and automations you’ve selected.
Work top to bottom:
- Platform — choose the network (Instagram, TikTok, Threads…). The available tools change per platform.
- Accounts — pick which accounts get these automations. The counter at the top right tracks your selection.
- Available automations — tick the tools you want. They’re grouped by purpose:
- Engagement — Like, Comment, LikeComments
- Content — Publish, SavePosts
- Growth — Follow, Unfollow, Contact
- Viewing — StoryViewer, ReelViewer
Use Select all to tick every tool at once, then click Add Automations to create them. They’ll appear on your dashboard, ready to configure.
Which tools should a new account start with?
The dialog lets you add all ten tools in one click — that doesn’t mean you should. What works in practice:
| Account stage | Add these | Why |
|---|---|---|
| Fresh / just connected | StoryViewer or a viewer tool only | Viewing is the gentlest signal — perfect for warm-up |
| Warmed up (week 2+) | + Like, then Follow | Layer engagement one tool at a time so you can attribute any pushback |
| Established | + Comment, Publish, Unfollow | The full growth stack, each tool with a clear job |
After you click Add Automations
The new tools land on the Automations dashboard, one row per tool per account — created stopped, with default settings. For each one, the setup order that keeps you safe:
- Open the tool and set its limits on the Settings tab (start at the low end of the safe ranges).
- Turn on at least one source on the Sources tab — a tool with no sources has nothing to act on and simply won’t run.
- Flip the Status toggle to start it.