Let Your AI Make Changes
Allow supported edits, agree on a specific change and check what was saved.
Ready for your assistant to help with the setup, not just explain it? This lesson shows how to allow changes through MCP and keep each request clear and deliberate.
Before you start: complete the read-only check. You should already have a working connection. If you only want explanations and reports from an external assistant, you can stay read-only and skip this step.
Understand what you are allowing
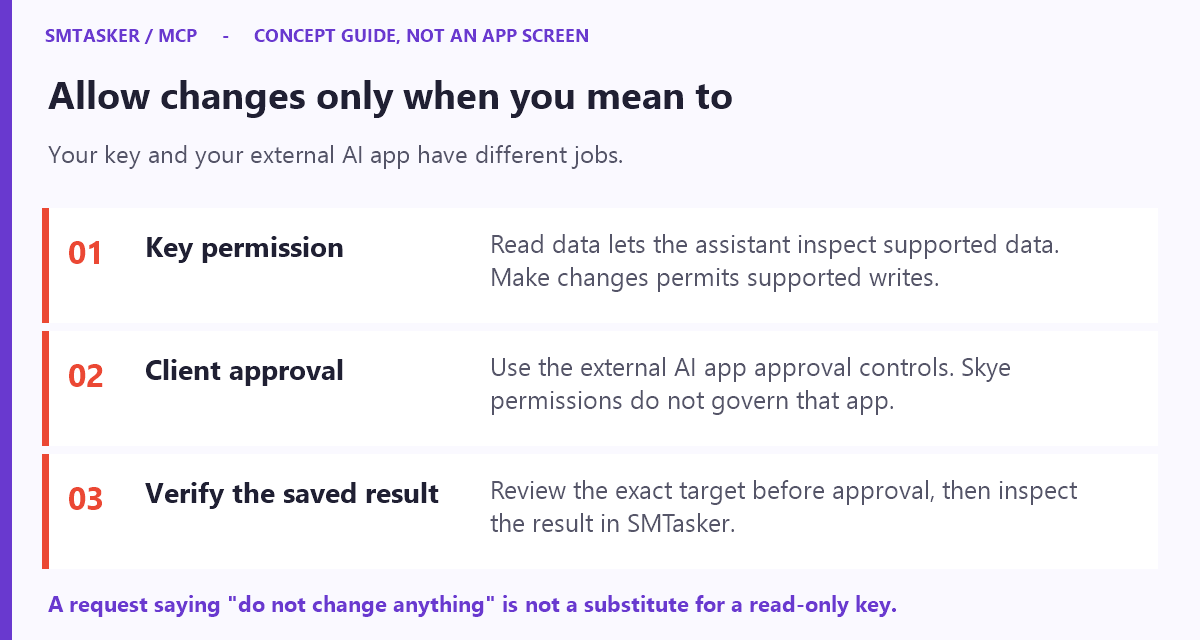
Read data lets the assistant look at workspace information. Make changes also allows supported edits. That can save you from entering settings yourself, but it gives the connection more power.
A message saying “ask me first” is a useful instruction, not a replacement for permissions. Check the approval controls in your external AI app too. Do not assume it will show Skye’s Apply button before every change.
This permission is not limited to the automation in your next prompt. The form warns that write access allows real changes to accounts, devices and automations. Keep the connection’s approval controls enabled and name the exact target in every request.
Step 1: Create access for changes
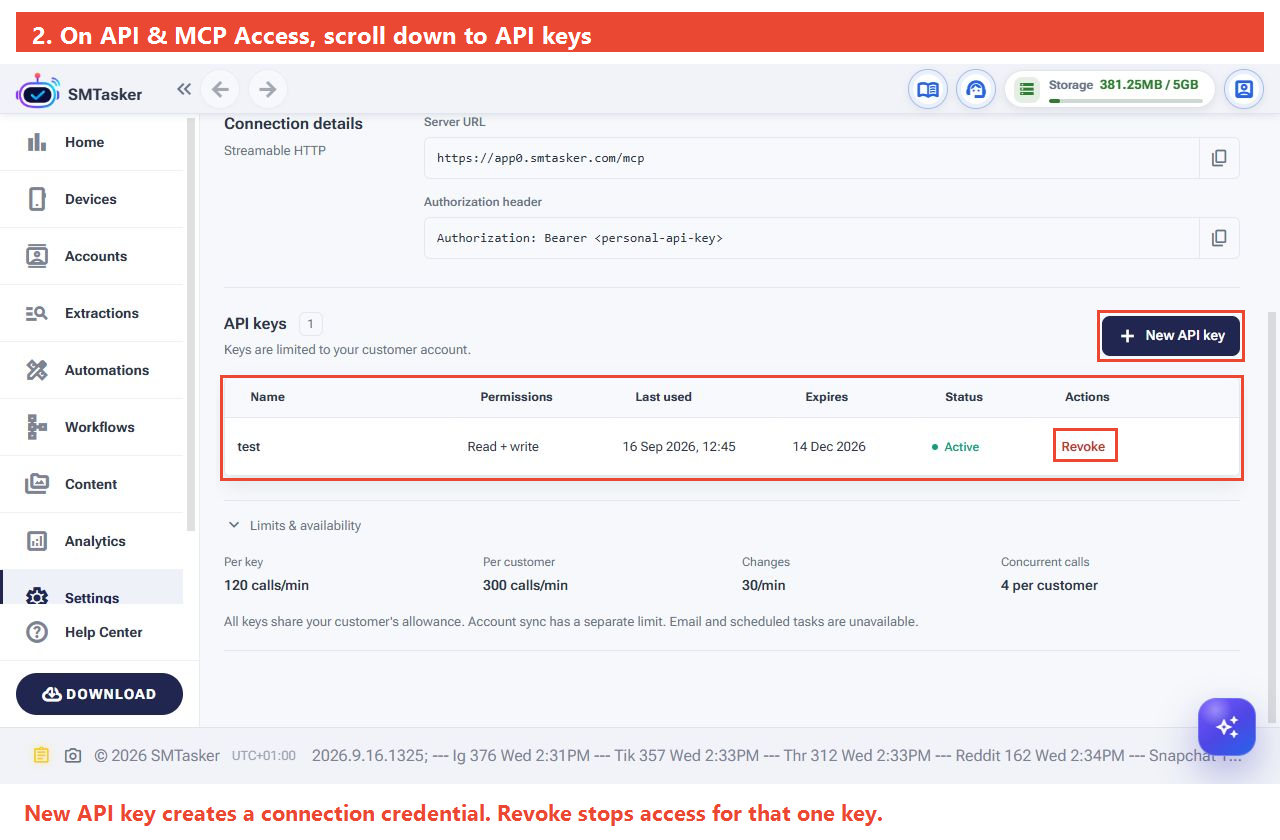
In SMTasker: open Settings → API & MCP Access. Scroll to API keys and click New API key.
We use a separate key so you can recognize write-enabled access later. Creating it does not automatically replace the key Codex is already using.
- Use a name such as My AI — setup access.
- Choose an expiration date.
- Keep Read data checked and enable Make changes.
- Click Create key and store the generated code privately.
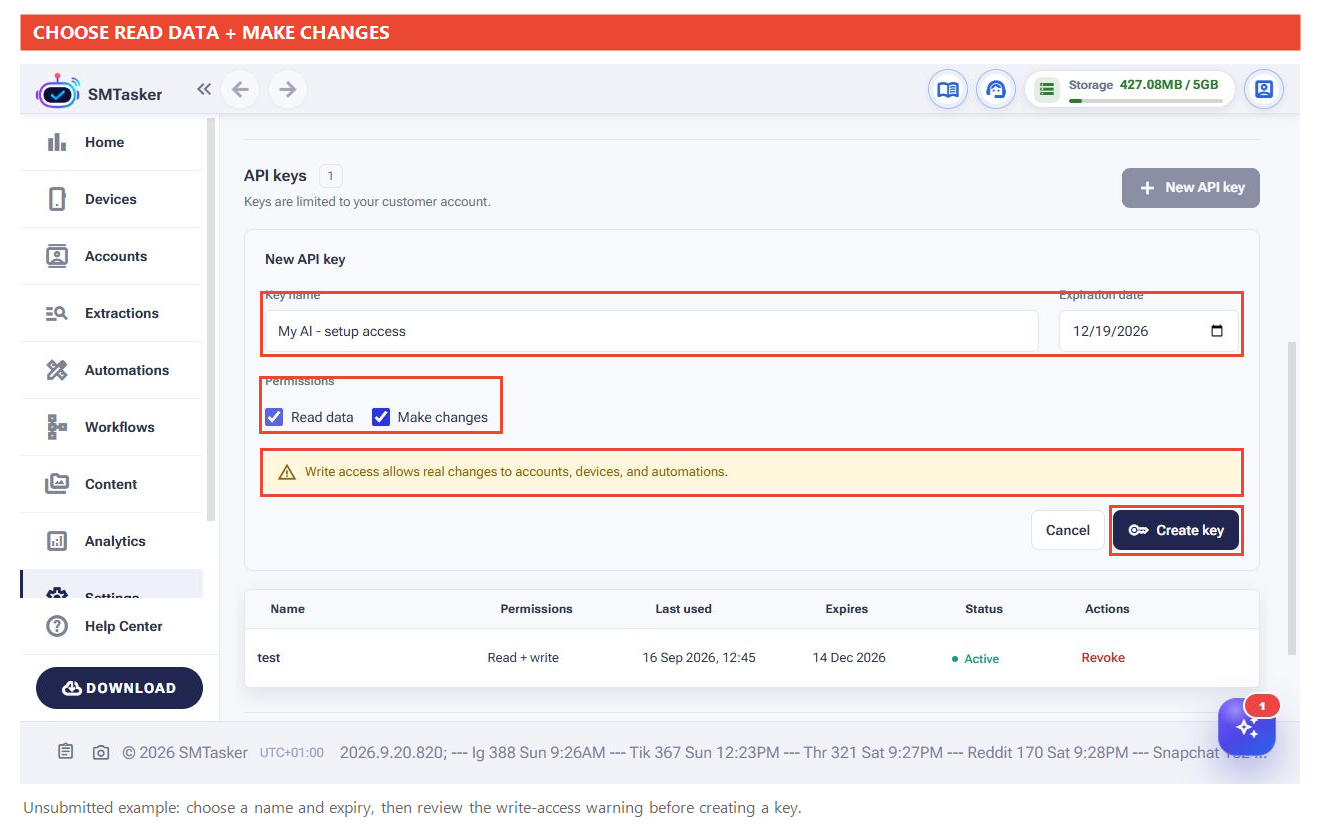
Only do this for an assistant you trust. Never put the generated key in an ordinary chat, screenshot or support message.
Step 2: Update your assistant’s connection
In your AI app: ask it to help replace the read-only key using the same private entry method you used during setup. The SMTasker Server URL stays the same.
I want to update my SMTasker connection to use a key that allows changes. Guide me through entering the replacement key privately, outside this chat. Preserve my other connections and approval settings. Do not change anything in SMTasker yet.
Follow any restart or new-task instructions for your app. Verify a read-only question still works. You have changed the connection’s permission—not asked it to edit an automation yet.
Keep the earlier read-only key private if you plan to switch back. Do not revoke another integration’s key by mistake. If the assistant still reports read-only access, check that this connection is actually using the replacement key before changing anything else.
Step 3: Agree on one change first
Start small. Name the account and automation, describe the intended edit, and say what must stay untouched. Ask for a proposal before authorizing the edit.
Inspect the stopped automation AUTOMATION_NAME on ACCOUNT_NAME. My goal is: DESCRIBE_YOUR_GOAL. Explain which settings you would change and what would stay the same. Do not apply changes or start anything. Wait for me to approve a specific proposal.
Replace the three placeholders first. This example assumes the automation is already stopped. If you want to work on a running automation, say so explicitly and discuss its status rather than asking the assistant to guess.
Read the proposal. If a target is ambiguous, clarify it. If the assistant suggests starting the automation or changing other tools, stop and narrow the request.
Check the saved result before running anything
After approving a specific edit, open that automation in SMTasker. Compare the saved settings with the proposal and check that it remains stopped. A chat confirmation is useful, but the saved product settings are what you will actually run.
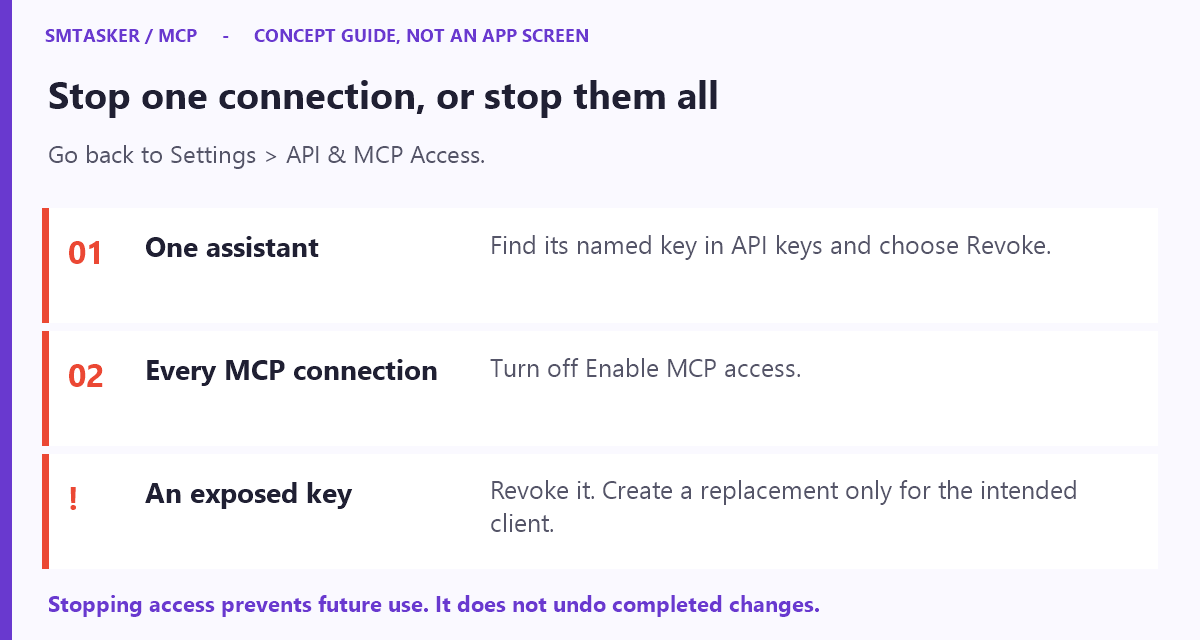
When you no longer want the assistant to make changes, return to Settings → API & MCP Access → API keys and revoke its write-enabled key. Reconnect with read-only access if you still want workspace checks.
Revoking a key stops access through that key; it does not undo edits already saved or stop an automation that is running. Check automation status separately in SMTasker. To go back to read-only, use a valid read-only key in your assistant’s connection and test a simple question again.